What Chinese Calligraphy Is and Why It Captivates Beginners
Imagine picking up a brush, dipping it in ink, and watching a single stroke carry the weight of 3,000 years of artistic tradition. That is the experience waiting for you in Chinese calligraphy for beginners. But before you lift the brush, it helps to understand exactly what this practice is and why so many modern learners are drawn to it.
What Is Chinese Calligraphy
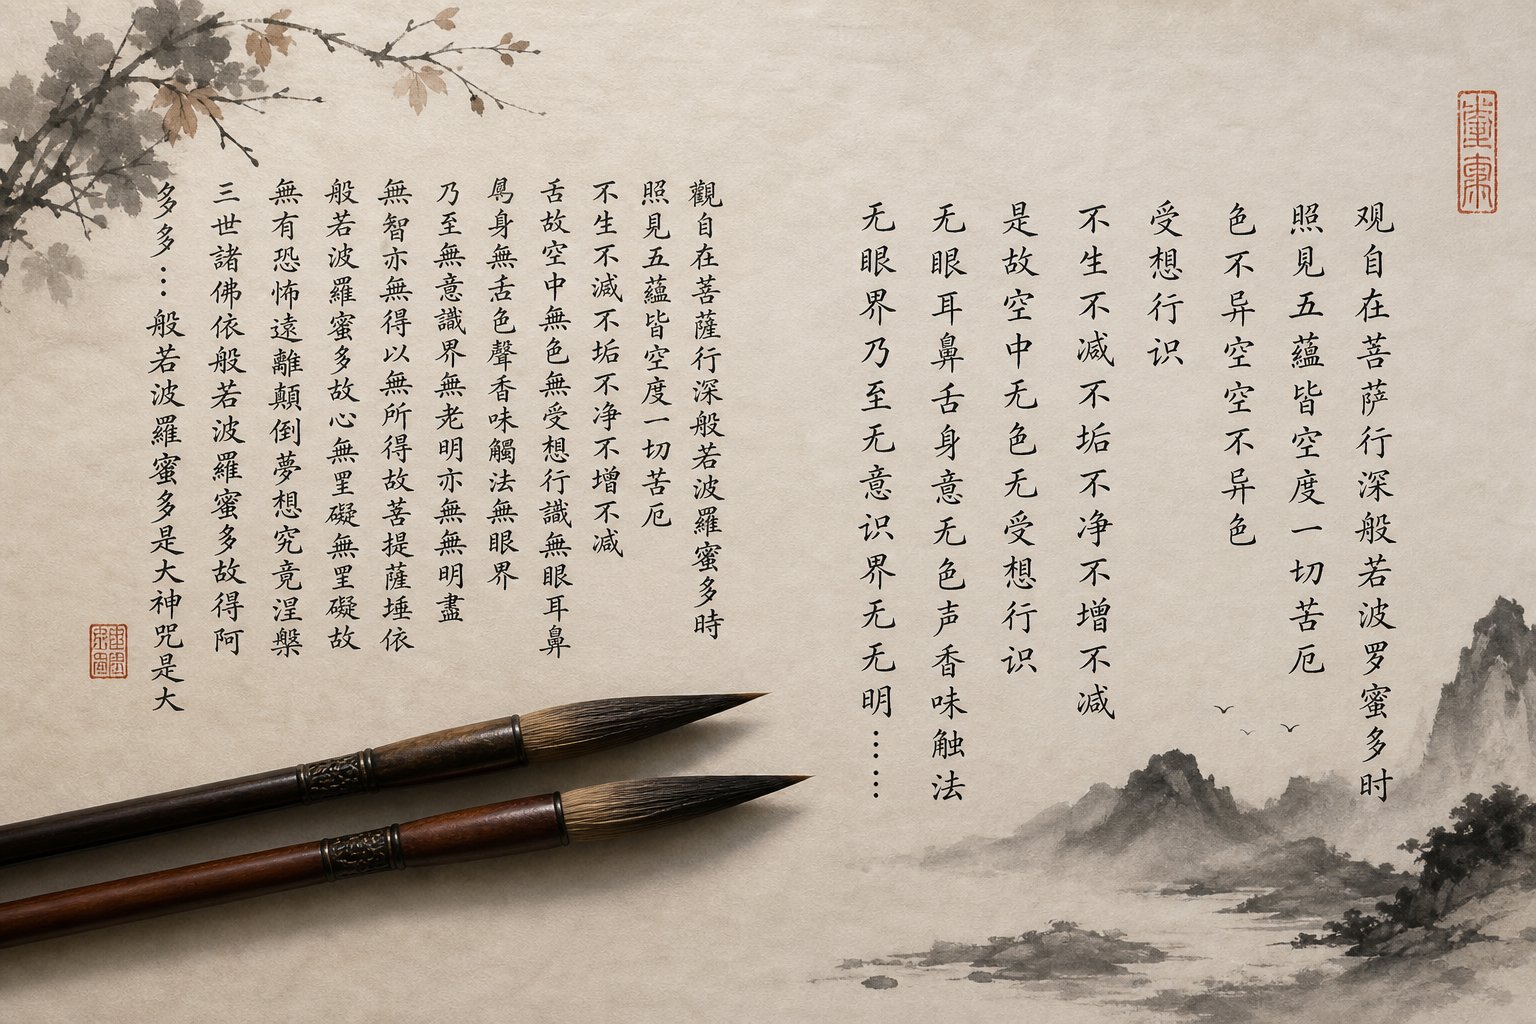
Chinese calligraphy (shufa) is the art of writing Chinese characters with a brush and ink as a form of visual expression, combining the meaning of written language with the aesthetic beauty of brushwork. It is both a fine art and a meditative discipline rooted in over three millennia of East Asian tradition.
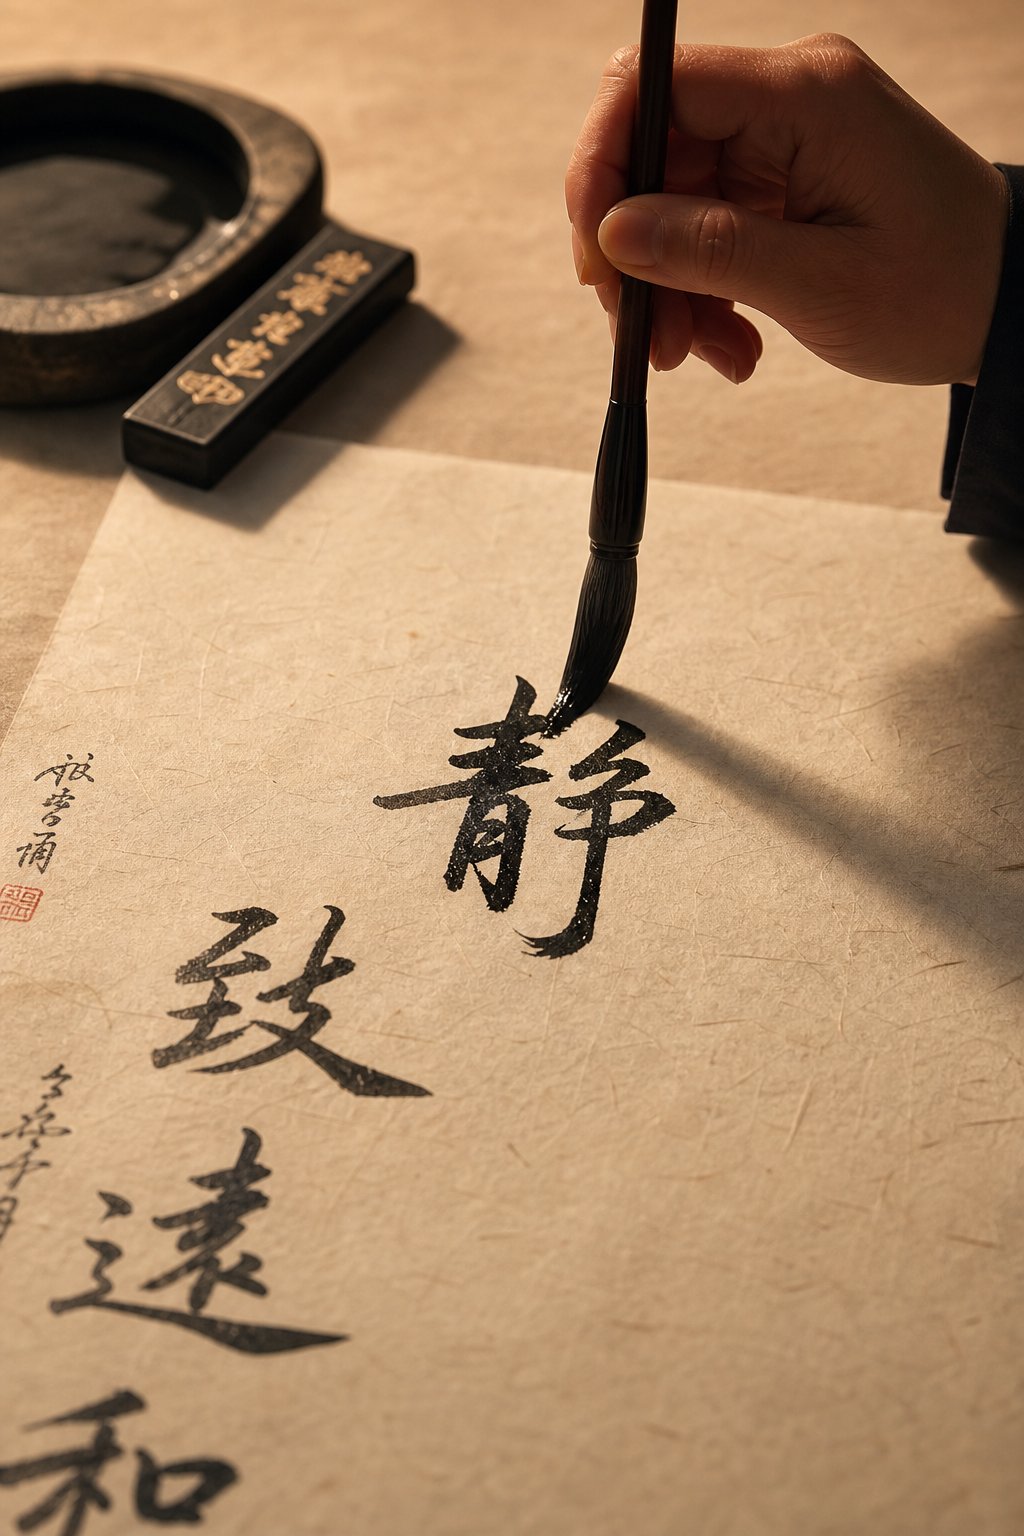
So what is chinese calligraphy in practical terms? It is the world's oldest abstract art — the art of the line, as scholars describe it. A calligrapher wields a pliant brush, controls pressure, speed, and direction, and produces strokes that capture kinetic energy on paper. Each character carries both literal meaning and visual personality, making chinese calligraphy with meaning a deeply layered practice.
If you come from a Western calligraphy or hand-lettering background, you will notice key differences right away. Western calligraphy typically uses a rigid broad-edge or pointed nib to form letters from a fixed alphabet. East asian calligraphy relies on a soft, flexible brush that responds to the subtlest shift in pressure, producing strokes that range from hairline thin to dramatically bold within a single movement. Where Western lettering emphasizes consistent, repeatable letterforms, Chinese calligraphy prizes the expressiveness of each individual stroke as a reflection of the writer's spirit.
Why Learn Chinese Brush Calligraphy Today
The benefits go far beyond producing beautiful characters. Chinese calligraphy is a form of mindfulness in motion. Each stroke requires precise coordination of hand, arm, and breath, drawing your attention fully into the present moment. Research into mindfulness-based art practices suggests this kind of focused, repetitive creative work can lower stress, improve emotional regulation, and promote a state of flow where self-consciousness fades.
There is also the cultural dimension. Calligraphy connects you to philosophical traditions rooted in Confucian discipline, Taoist harmony, and Zen presence. You are not just learning to write — you are participating in a living art form that has shaped visual culture across China, Japan, and Korea for centuries.
Here is what matters most for beginners: calligraphy is a lifelong practice, not a weekend project. Approach it with patience rather than perfectionism. Your early strokes will be uneven. That is normal and expected. The goal is not flawless output from day one — it is steady, mindful engagement with the brush. This guide will walk you through everything from choosing your first tools to writing your first complete characters, one step at a time.
Understanding the Five Major Script Styles
Chinese calligraphy is not a single, uniform style. Over thousands of years, five distinct script styles emerged, each reflecting the cultural values and practical needs of its era. Think of them as a family tree — each branch growing from the one before it, carrying forward certain traits while developing its own personality. Understanding this progression gives you context for your own practice and helps you appreciate why calligraphy in chinese takes so many visual forms.
The Five Script Styles at a Glance
The Chinese term for these styles is wuti (five scripts), and they represent the complete evolution of written Chinese from pictographic origins to expressive abstraction. Here is a quick comparison to orient you before we look at each one:
| Script Name | Chinese Name | Era of Origin | Difficulty Level | Best For |
|---|---|---|---|---|
| Seal Script | 篆书 (zhuan shu) | Shang/Zhou Dynasty (1600-221 BCE) | Moderate | Seal carving, decorative art |
| Clerical Script | 隶书 (li shu) | Qin/Han Dynasty (221 BCE-220 CE) | Moderate | Formal inscriptions, artistic display |
| Regular Script | 楷书 (kai shu) | Han to Tang Dynasty (200-907 CE) | Beginner-friendly | Learning fundamentals, everyday writing |
| Running Script | 行书 (xing shu) | Eastern Jin Dynasty (317-420 CE) | Intermediate | Daily handwriting, personal letters |
| Cursive Script | 草书 (cao shu) | Han Dynasty onward | Advanced | Artistic expression, emotional release |
Seal Script is the oldest, closest to the pictographic origins of Chinese writing. Its strokes use consistent thickness and rounded, symmetrical forms — almost like small drawings. The Qin Dynasty standardized it as the official script across China, and you will still see it carved into traditional name seals today.
Clerical Script emerged when government clerks needed to write faster. A common saying captures the shift perfectly: "Seal script is like a painting, Clerical script is like a wave." The strokes flattened out, horizontals gained a distinctive wave-like rhythm, and the characters became more abstract — less picture, more symbol.
Regular Script refined this further into the clean, square, upright characters you see in modern printed Chinese. Running Script loosened those rules slightly, connecting strokes for speed while remaining legible. And Cursive Script pushed the boundaries into pure artistic expression — written fast, often difficult to read even for native speakers, but full of rhythm and emotion.
Each style in this tradition of asian calligraphy carries its own aesthetic philosophy. Seal Script values symmetry and stillness. Cursive Script values spontaneity and movement. The famous Song Dynasty calligrapher Su Shi described the relationship this way: "Standard Script is like standing, Running Script is like walking, and Cursive Script is like running."
Why Regular Script Is the Best Starting Point
With five styles to choose from, where should a beginner start? The answer is almost universally Regular Script (kai shu). Here is why.
Regular Script contains every fundamental stroke type used in mandarin calligraphy. Horizontal, vertical, dot, hook, turning, rising, left-falling, right-falling — they are all present and clearly visible. Unlike Cursive or Running Script, where strokes merge and abbreviate, Regular Script keeps each stroke separate and distinct. You can see exactly where one ends and the next begins.
This clarity makes it the ideal training ground. When you practice Regular Script, you are building precise control over pressure, direction, and speed — skills that transfer directly to every other style. The well-defined rules and clear use of individual strokes in kai shu reward focused practice and give you immediate visual feedback on your technique.
There is also a historical reason. From the Tang Dynasty onward, Regular Script became mandatory for civil service examinations. It was the script every educated person had to master first. That tradition persists in calligraphy education today — learn the rules of Regular Script thoroughly, and you earn the freedom to break them expressively in Running or Cursive styles later.
The structure of Regular Script also teaches proportion and spatial awareness. Characters sit squarely within an imaginary grid, with balanced spacing between strokes. This discipline trains your eye to judge character architecture — a skill you will rely on no matter which style you eventually explore.
With a clear understanding of where Regular Script fits in the broader landscape, the next question becomes practical: what tools do you actually need to start writing?
Essential Tools for Chinese Brush Calligraphy
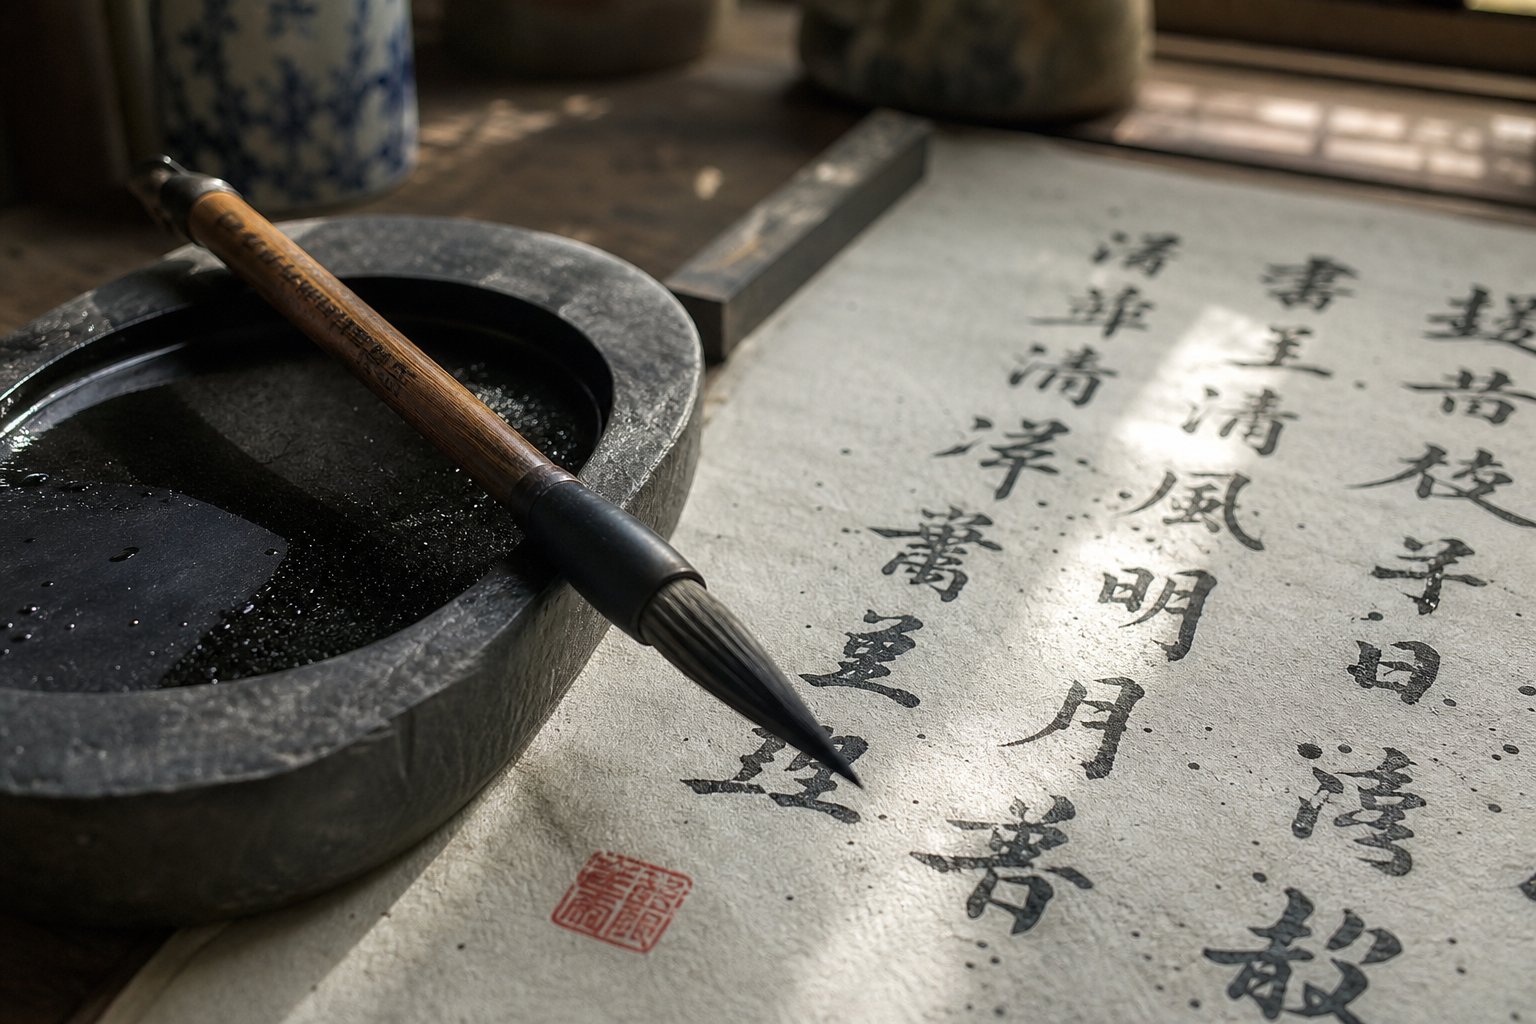
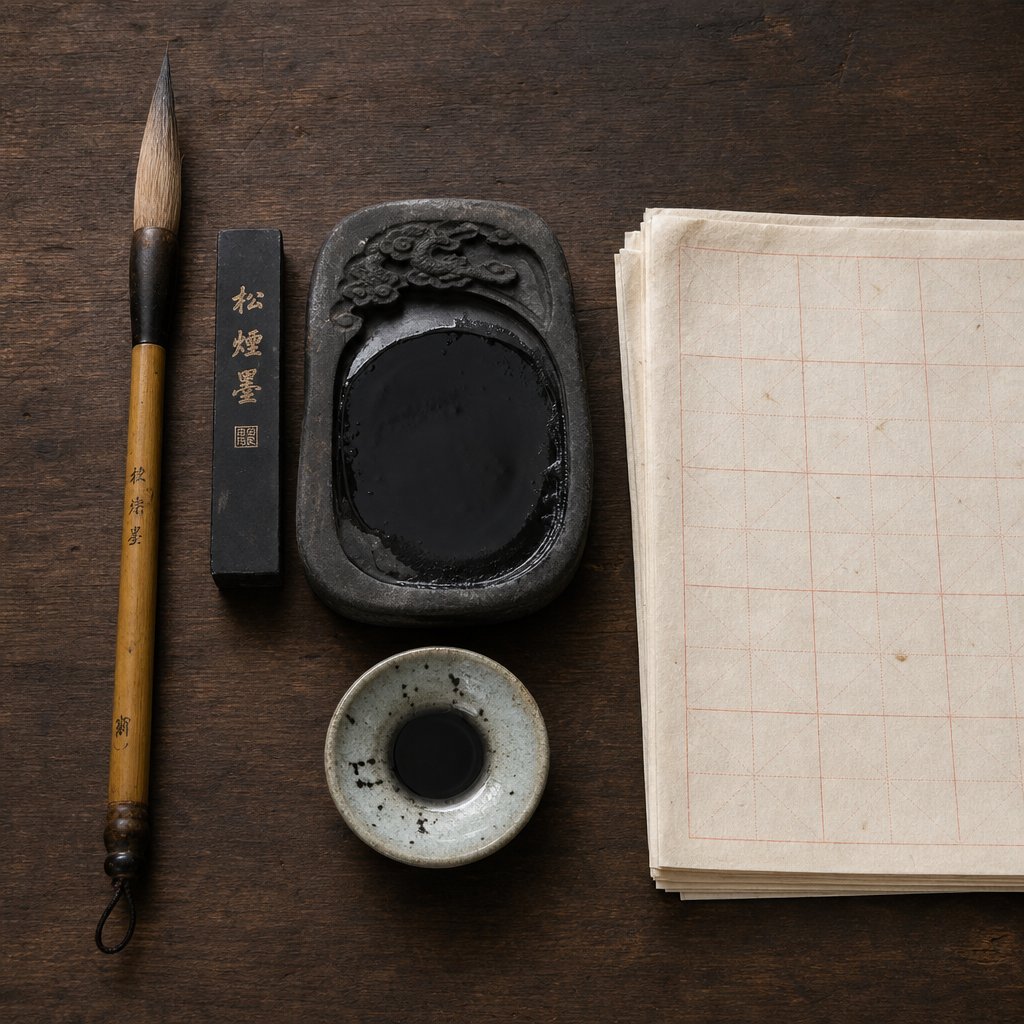
Every calligraphy tradition has its core materials, and Chinese calligraphy centers on four: the brush, ink, paper, and inkstone. Together they are called the Four Treasures of the Study (wenfang sibao), a term that dates back over a thousand years and reflects how deeply these tools are woven into Chinese scholarly culture. Choosing the right tools for chinese calligraphy does not require a large budget, but it does require understanding what each item does and why certain options work better for beginners.
Choosing Your First Brush
The brush is where everything starts. Unlike a pen, a calligraphy brush is soft, flexible, and responsive to the slightest change in pressure and angle. That responsiveness is what allows you to create chinese calligraphy with expressive, dynamic strokes — but it also means the brush type you choose directly affects how much control you have.
There are three main hair types to know:
Wolf hair (lang hao) — actually made from weasel fur — is firm and springy. The tip returns to its original shape after each stroke, giving you strong resistance and precise control. Professional calligraphers use these for small, detailed characters.
Goat hair (yang hao) is soft and highly absorbent. It holds a large amount of ink and produces rich, expressive strokes, but it requires more skill to manage. The softness means the brush follows your hand rather than guiding it, which can feel unpredictable when you are still developing muscle memory.
Mixed hair (jian hao) combines both — typically a core of firm weasel hair surrounded by softer goat hair. This gives you the ink absorption of a soft brush with the structural support of a hard one. As calligraphy expert Thomas Lam recommends, a mixed bristle brush provides optimum ink absorption and good resistance to stroke pressure, making it the ideal choice for beginners.
For brush size, think about the characters you will be writing. Small brushes suit characters of 2-5 cm, medium brushes handle 6-8 cm characters, and large brushes work for 9 cm and above. A medium-sized mixed-hair brush is the sweet spot for starting out — large enough to practice fundamental strokes clearly, controlled enough to build good habits.
Ink Options for New Practitioners
You have two choices here: bottled ink or traditional ink sticks. The difference is more than just convenience — it shapes your entire practice ritual.
Ink sticks are solid bars made from soot and vegetable oil. To use one, you add water to an inkstone and grind the stick in slow circles until the ink reaches your desired consistency. This process takes five to fifteen minutes and requires practice to get the density right. The payoff is superior ink quality — rich, deep black with subtle tonal variation — plus a meditative warm-up that settles your mind before you even touch brush to paper. Traditional Hui ink sticks have been produced for over 2,000 years and may be scented with musk, clove, or tree oils.
Bottled ink is pre-mixed and ready to pour. The consistency is uniform, the results are predictable, and you can start writing immediately. You can also pour excess ink back into the bottle, reducing waste.
For absolute beginners, bottled ink is the practical choice. Controlling ink density while simultaneously learning brush technique adds unnecessary complexity early on. Once your strokes feel stable and you want a deeper connection to the traditional process, ink sticks become a rewarding upgrade.
Paper and Inkstone Essentials
Paper is not a neutral surface in chinese brush calligraphy — it actively shapes how your strokes behave. The same brush movement can look clean and controlled on one paper and blurry on another. Understanding why helps you avoid blaming your technique for what is actually a material problem.
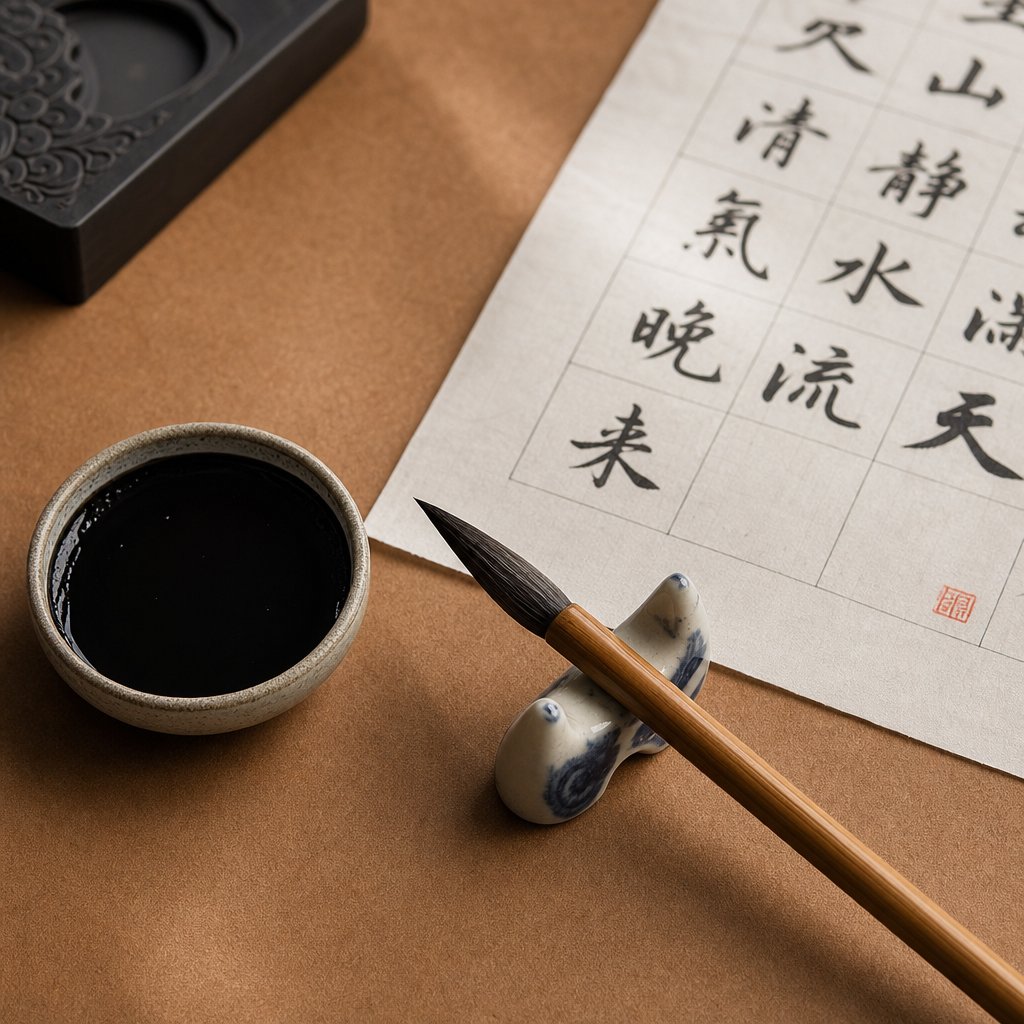
Gridded practice paper is designed specifically for learning. It features printed guidelines — usually dividing each square into quadrants or diagonal sections — that show you exactly where strokes should begin, end, and intersect. This structure trains your eye for proportion, alignment, and spacing. The paper itself has moderate absorbency, meaning ink does not spread too quickly, giving you more time to control each stroke. As one calligraphy paper guide notes, practice paper reduces complexity and lets you focus on movement without worrying about unpredictable ink behavior.
Rice paper (Xuan paper) is the traditional material for finished work. It is more absorbent, more reactive to pressure and speed, and produces more expressive results. But that sensitivity makes it unforgiving — small mistakes become immediately visible, and ink spreads faster than beginners expect. Save it for after your basic strokes feel confident.
The inkstone serves as your ink reservoir. If you use bottled ink, a simple ceramic or plastic dish works perfectly — you just need a shallow surface to dip your brush. If you eventually move to ink sticks, you will want a traditional stone inkstone with a grinding surface. There is no need to invest in an expensive carved stone at this stage.
Here is a practical starter kit that covers everything you need for your first months of practice:
- 1 medium-sized mixed-hair brush (jian hao)
- 1 bottle of Chinese calligraphy ink (100-250 ml)
- 50-100 sheets of gridded practice paper (mi zi ge or jiu gong ge grid style)
- 1 ceramic or plastic ink dish
- 1 felt desk mat to protect your work surface and prevent paper slipping
- 1 brush rest or small dish to hold your brush between strokes
- A few sheets of rice paper for occasional testing once you gain confidence
This setup keeps costs low while giving you reliable, consistent materials to build your foundation. Quality matters more than quantity — a single good brush paired with proper practice paper will teach you far more than a drawer full of random supplies. With your tools assembled and your workspace ready, the real work begins: learning the fundamental strokes that form every Chinese character.
Mastering the Eight Basic Strokes and Stroke Order
Every Chinese character — from the simplest one-stroke symbol to the most complex 30-stroke compound — is built from the same set of fundamental movements. There are only eight. Learn these eight chinese calligraphy strokes well, and you hold the key to writing any character you encounter. Skip them, and every character you attempt will feel like guesswork.
Think of it this way: you would not try to play a piano concerto without first learning scales. These strokes are your scales. They train your hand to produce specific shapes with specific pressures, and they give you a vocabulary of movements that combine endlessly into thousands of characters.
The Eight Basic Strokes Explained
The Chinese tradition calls these the Eight Principles of Yong (yongzi bafa), named after the character 永 (yong, meaning "eternity") because it contains all eight stroke types in a single character. Below is each stroke with its Chinese name, the correct brush movement, and what to watch for when you write in chinese calligraphy.
- Horizontal (heng 横) — Start with a slight downward press to anchor the beginning, then move the brush evenly to the right with consistent pressure. End with a controlled pause and gentle lift. A correct horizontal stroke has a subtle thickening at both ends and a steady middle. An incorrect one looks flat, tapers unevenly, or slants noticeably upward or downward.
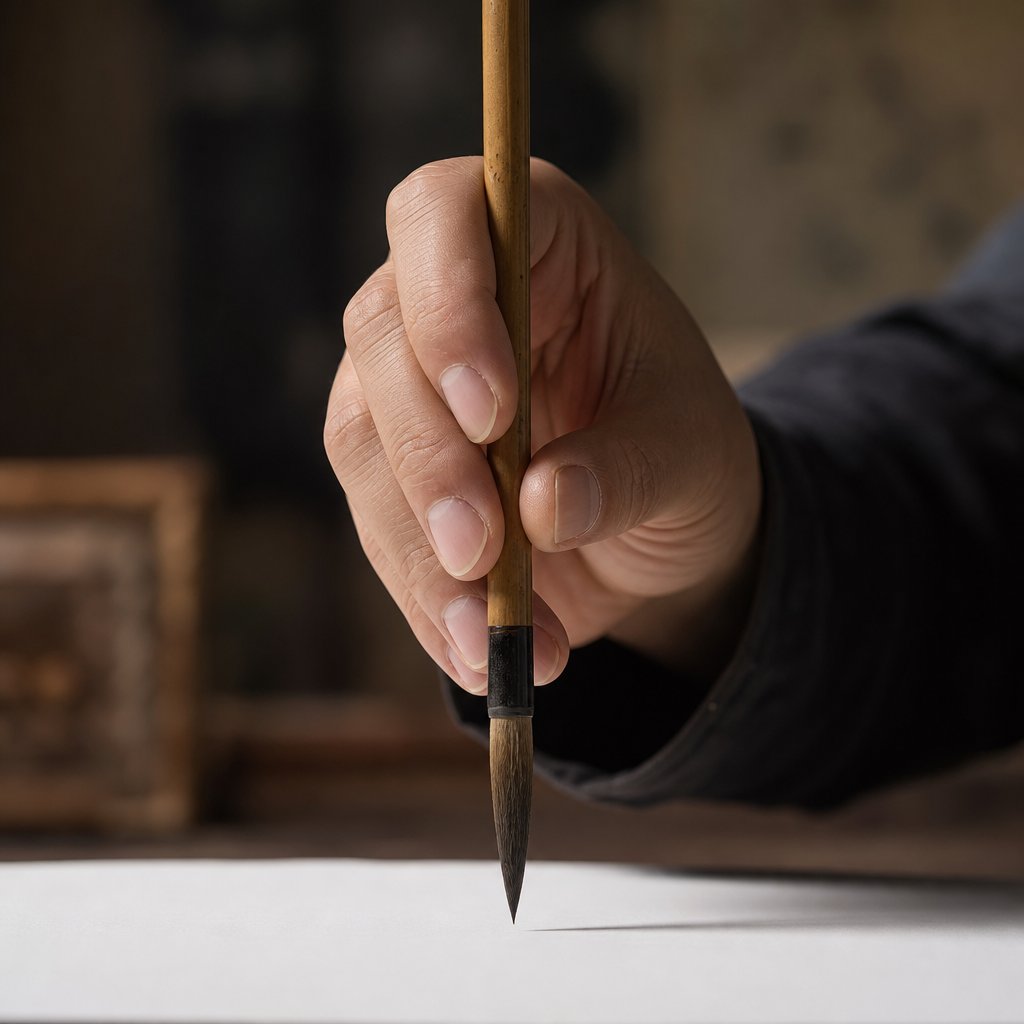
- Vertical (shu 竖) — Press lightly at the top to establish the starting point, then draw the brush straight down with steady, even pressure. End either with a pointed taper (suspended needle) or a rounded pause (dewdrop). The stroke should stand perfectly upright like a pillar. Wobbly or curved verticals usually mean you are gripping too tightly or moving from the wrist instead of the arm.
- Left-falling (pie 撇) — Begin with a firm press at the upper right, then sweep downward to the left while gradually lifting pressure. The stroke starts thick and ends thin, creating a graceful taper. It should curve gently rather than cutting in a straight diagonal. If your left-falling strokes look stiff or end abruptly, you are likely stopping the brush rather than letting it lift naturally off the paper.
- Right-falling (na 捺) — This is the mirror complement to the left-falling stroke. Start lightly at the upper left, gradually increase pressure as you move down and to the right, and finish with a strong, broad "foot" before lifting. The thickest point is near the end. A common mistake is starting too heavy or failing to create that distinctive widening at the base.
- Dot (dian 点) — Despite its small size, the dot is not a simple tap. Press the brush down at an angle, creating a teardrop or rounded triangular shape, then lift cleanly. The dot should have a clear beginning and a defined edge — not a perfect circle, and not a shapeless blob. Size should be proportional to the other strokes in the character.
- Hook (gou 钩) — The hook never appears alone. It attaches to the end of another stroke — a vertical, horizontal, or diagonal — as a sharp, quick flick. After completing the parent stroke, pause briefly, then redirect the brush in a short, decisive movement. The hook should be crisp and angular. If it looks rounded or mushy, you are turning too slowly or without enough pressure at the pivot point.
- Turning (zhe 折) — This stroke involves a smooth change of direction within a single continuous movement, most commonly from horizontal to vertical. Write the first direction normally, then at the turning point, press slightly to create a visible corner before continuing in the new direction. The turn should be sharp but not broken — the brush never leaves the paper. A common error is rounding the corner too much, which makes characters look soft and imprecise.
- Rising (ti 提) — Start with pressure at the lower left, then flick the brush upward and to the right while lifting. The stroke begins thick and ends thin, moving at an upward angle. It should feel like a quick, energetic lift. If your rising strokes look heavy or flat, you are not releasing pressure quickly enough as you move upward.
You will notice that several of these strokes share a common principle: controlled variation in pressure. Writing chinese calligraphy is not about applying uniform force. It is about knowing when to press and when to lift, when to move slowly and when to accelerate. That dynamic quality is what gives brush calligraphy its life and energy compared to flat, mechanical lines.
Stroke Order Rules Every Beginner Must Know
Knowing the eight strokes is only half the equation. The order in which you write them within a character matters just as much. Chinese stroke order (bishu) follows a consistent set of rules that have been standardized for centuries. These rules exist for practical reasons: they create natural flow from one stroke to the next, produce better-balanced characters, and allow you to write at speed once the movements become automatic.
Imagine writing the character 十 (ten). If you wrote the vertical stroke first and then tried to cross it with the horizontal, your hand would need to jump backward and reposition awkwardly. Writing horizontal first, then vertical, keeps your hand moving in a natural downward progression. That is stroke order logic in action.
Here are the six core rules that govern how you write in chinese calligraphy:
- Top to bottom (cong shang dao xia) — When a character has components stacked vertically, write the upper parts before the lower parts. Example: in 言 (speech), the top horizontal stroke comes first, and you work your way down.
- Left to right (cong zuo dao you) — When a character has components arranged side by side, write the left component before the right. Example: in 林 (forest), the left 木 is completed before the right 木.
- Horizontal before vertical (xian heng hou shu) — When a horizontal stroke and a vertical stroke cross, write the horizontal first. Example: in 十 (ten), the horizontal stroke precedes the vertical.
- Left-falling before right-falling (xian pie hou na) — When both diagonal strokes appear, the left-falling stroke comes first. Example: in 人 (person), the left-falling pie is written before the right-falling na.
- Outside before inside (cong wai dao nei) — When a character has an enclosing frame, write the outer frame before filling in the interior. Example: in 回 (return), the outer box is drawn before the inner box.
- Close frames last (xian jin hou guan) — If a frame encloses content on all sides, write the top and sides first, fill in the interior, then add the closing bottom stroke. Example: in 国 (country), the bottom horizontal of the outer frame is the final stroke.
A bonus principle worth noting: in vertically symmetrical characters like 水 (water) or 小 (small), the center stroke is written first, followed by the strokes on either side. This keeps the character anchored around its central axis.
These rules might seem like a lot to memorize in the abstract, but they become intuitive quickly once you start practicing actual characters. After writing just a dozen or so characters with correct stroke order, you will find yourself predicting the sequence before you even look it up. The rules follow the natural movement of the hand — top to bottom, left to right — which is why Chinese calligraphers describe proper stroke order as feeling "smooth" rather than forced.
More importantly, correct stroke order directly affects the visual quality of your characters. Each stroke is positioned relative to the one before it. When you follow the proper sequence, your spacing and proportions naturally fall into place. When you do not, characters tend to look cramped on one side or unbalanced — problems that no amount of careful drawing can fully fix.
With these eight strokes and six ordering rules as your foundation, the next step is putting them together into actual characters — starting with the simplest ones and building toward more complex compositions that carry real meaning.
Your First Chinese Calligraphy Characters and Why They Matter
Strokes and rules are essential, but they only become real when you combine them into actual chinese calligraphy characters. The question most beginners face is simple: which characters should I write first? The answer is not random. Each character below is chosen because it isolates specific stroke mechanics, letting you build skill in a logical sequence rather than jumping into complexity too soon.
Simple Characters That Teach Core Techniques
Unlike a calligraphy alphabet chinese learners might expect from Western lettering, Chinese has no fixed set of 26 symbols to memorize. Instead, you build fluency character by character, each one reinforcing different stroke combinations. Here is a progression that takes you from a single horizontal line to multi-stroke compositions:
- 一 (yi — one) — A single horizontal stroke. This is your first test of even pressure, consistent thickness, and controlled start and finish. Practice it until the stroke feels smooth and deliberate, not rushed.
- 二 (er — two) — Two horizontal strokes with proper spacing. This teaches you to judge vertical distance between parallel strokes and keep both at consistent length and weight.
- 三 (san — three) — Three horizontals. The challenge increases: the middle stroke is slightly shorter, and all three must be evenly spaced. This trains your eye for proportion within a single character.
- 十 (shi — ten) — Your first combination of horizontal and vertical. You practice the stroke order rule of horizontal before vertical and learn to center the crossing point.
- 人 (ren — person) — Combines left-falling and right-falling strokes. This character teaches you to balance two diagonal movements that meet at a single point at the top.
- 大 (da — big) — Adds a horizontal stroke above the structure of 人. You practice integrating three different stroke types and distributing them symmetrically within the grid.
- 木 (mu — tree) — Builds on 十 by adding left-falling and right-falling strokes below the crossing point. Four stroke types in one character, all requiring careful centering.
- 水 (shui — water) — Introduces the hook and the rising stroke alongside left-falling movements. The center vertical with hook anchors the character while shorter strokes radiate outward.
- 山 (shan — mountain) — Three verticals of different heights connected by a turning stroke at the base. This teaches you to vary stroke length deliberately while maintaining a stable foundation.
- 永 (yong — eternity) — The culmination. This single character contains all eight basic strokes, which is why it has been used as a training exercise for centuries under the tradition known as the Eight Principles of Yong.
Work through these chinese calligraphy letters in order. Spend at least a full practice session on each before moving to the next. Rushing ahead before a character feels natural defeats the purpose — each one builds muscle memory that the next character depends on.
Characters With Cultural Meaning Worth Practicing
Once you can write the ten characters above with reasonable control, you are ready to explore calligraphy chinese words that carry deeper significance. Meaningful characters give your practice emotional weight and keep motivation high during the repetitive early stages.
永 (yong — eternity) deserves special attention. Its visual structure — two streams merging into a continuously flowing form — is where the meaning of "eternal" originates. Calligraphy groups and classes still use this character as a core exercise because mastering it means you have internalized every fundamental stroke type in a single, balanced composition.
Other characters worth practicing for their positive meanings include:
- 和 (he — harmony) — A character central to Chinese philosophy, combining multiple stroke types including turning and hook strokes.
- 心 (xin — heart/mind) — Teaches the hook and dot strokes in a flowing, organic shape that differs from the rigid geometry of earlier characters.
- 福 (fu — good fortune) — A more complex character often displayed during Lunar New Year. It serves as a milestone goal once your basics are solid.
- 道 (dao — the way/path) — Connects your practice to Taoist philosophy and introduces the enclosure stroke pattern.
There is a cultural dimension worth noting here. In Chinese tradition, written characters are treated with respect — historically, paper bearing writing was never carelessly discarded or stepped on. This reverence reflects the belief that chinese calligraphy words carry a kind of living energy. When you practice, you are not just making marks on paper. You are engaging with symbols that have carried meaning across millennia. That awareness can transform routine practice into something more intentional and grounding.
With a clear sequence of characters to work through, the next challenge is structuring your practice time so that progress stays consistent rather than scattered.
Building a Structured Practice Routine
Knowing which strokes and characters to practice is one thing. Knowing how to organize that practice across days and weeks is what actually produces visible improvement. Most beginners sit down with good intentions, write for a while, and then wonder whether they are making progress or just repeating the same mistakes. A structured plan removes that uncertainty. It tells you exactly what to focus on, how long to spend, and what "good enough to move forward" looks like.
A Four-Week Practice Progression Plan
This plan assumes you can dedicate 20 to 40 minutes per day to chinese calligraphy practice. If you have less time, extend each week to ten days. The key principle is consistency over duration — fifteen focused minutes daily will outpace an occasional two-hour session every time.
| Week | Focus Area | Daily Practice Time | Goals |
|---|---|---|---|
| Week 1 | Brush control and basic strokes | 20-30 minutes | Write clean horizontal, vertical, and dot strokes with consistent pressure. Develop a comfortable brush grip and posture. |
| Week 2 | Stroke combinations and simple characters | 25-35 minutes | Combine strokes into characters like 一, 二, 三, and 十. Apply stroke order rules correctly without checking references. |
| Week 3 | Multi-stroke characters and spacing | 30-40 minutes | Write characters with 4-5 strokes (大, 木, 水) with balanced proportions. Use grid quadrants to check alignment. |
| Week 4 | Short phrases and personal rhythm | 30-40 minutes | Write 永 with all eight strokes. Combine 2-3 characters in sequence with consistent size and spacing. Begin developing a natural writing pace. |
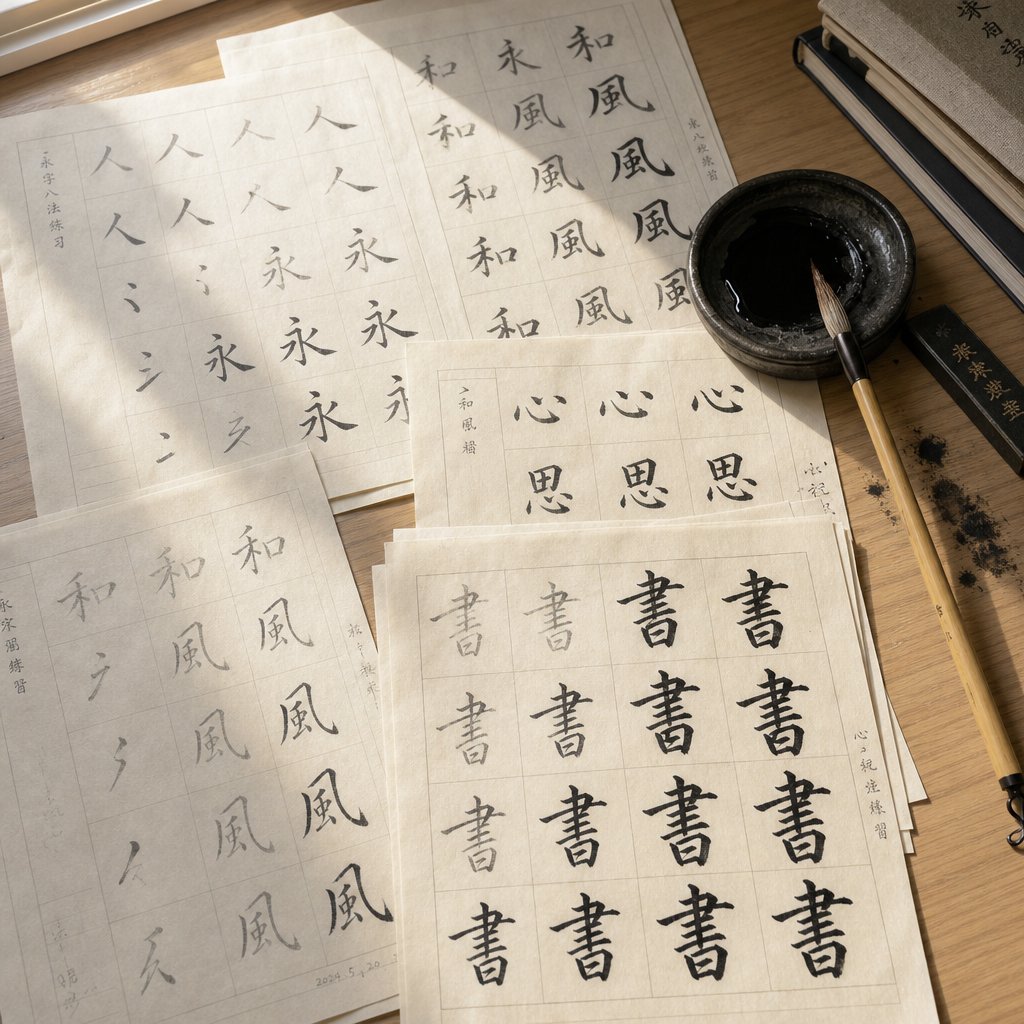
Each session should follow a simple structure that mirrors how experienced calligraphers warm up. Start with five minutes of basic stroke repetition — even in week four. This is not remedial work. It calibrates your hand and settles your focus before you move into more complex writing. Then spend the bulk of your time on the week's focus area. End with five minutes of review, comparing your work to a model and noting one specific thing to improve next time.
You will notice the daily time increases slightly each week. That is intentional. As characters grow more complex, you need more repetitions to internalize their structure. But even on busy days, a shortened session of fifteen minutes focused on stroke drills keeps your muscle memory active and prevents backsliding.
A practical tip: date your practice sheets. After two weeks, pull out your earliest work and compare it to your current writing. The improvement is often invisible day to day but dramatic over a span of fourteen sessions. This visual evidence of progress is one of the most effective motivators to learn chinese calligraphy consistently.
Practicing Without a Teacher
Self-directed practice works — but only if you develop the ability to evaluate your own writing honestly. Without a teacher pointing out errors in real time, you need clear criteria to assess whether your strokes are on track or drifting into bad habits.
Here is what to look for each time you review your work:
- Consistent thickness — Compare the same stroke across multiple repetitions. A horizontal stroke should have roughly the same weight each time you write it. Wild variation means your pressure control needs more attention.
- Clean starts and endings — Each stroke should begin with a deliberate entry and end with a controlled finish. Frayed beginnings suggest you are moving before the brush is properly positioned. Trailing endings mean you are lifting too slowly or dragging the brush off the paper.
- Proper proportions within the grid — Use the grid lines on your practice paper as a diagnostic tool. Is the character centered? Do strokes extend to roughly the same distance on each side? Are horizontal strokes level? The grid does not lie.
- Stroke order accuracy — Occasionally write a character very slowly and deliberately check each stroke against the correct sequence. Incorrect order often produces subtle spacing problems that are hard to identify otherwise.
When you spot a weakness, resist the urge to fix everything at once. Pick the single most obvious issue and focus your next session on that alone. Trying to correct multiple problems simultaneously splits your attention and slows progress on all of them. As one practice guide puts it, improvement is gradual — trust the process and focus on one element at a time.
Frustration is normal and expected. There will be sessions where your strokes feel worse than the day before. This is not regression. It often signals that your eye is developing faster than your hand — you can now see flaws that were always there but previously invisible to you. That heightened awareness is a sign of growth, not failure. The calligraphy community sometimes describes this as "getting worse before getting better," and it typically resolves within two to four weeks of consistent targeted practice.
Joining a chinese calligraphy class — whether in person or online — can accelerate your learning significantly. A skilled instructor spots technique issues in seconds that might take you weeks to self-diagnose, particularly problems with brush angle and arm movement that are difficult to observe in your own writing. But a class is not required to build solid fundamentals. With the structured plan above, honest self-assessment, and patience with the process, you can develop real competence independently. The most important factor is not whether you have a teacher. It is whether you show up consistently, practice with intention, and stay curious about what each session reveals.
Troubleshooting Common Beginner Mistakes in Chinese Calligraphy Writing
Structured practice and good intentions will carry you far, but every beginner hits a point where something looks wrong and the cause is not obvious. Your strokes bleed into shapeless puddles. Your lines wobble no matter how carefully you move. Your characters lean to one side or feel cramped in their grid squares. These problems are universal — they are not signs that you lack talent. They are signals that one specific variable needs adjusting.
The frustrating part of writing in chinese calligraphy is that multiple factors interact simultaneously: paper, ink, brush load, speed, grip, posture, and pressure all affect the final result. When something goes wrong, isolating the actual cause saves you from fixing the wrong thing. Below are the three most common problem categories beginners encounter, with specific causes and corrections for each.
Ink Bleeding and Paper Problems
You write a stroke and watch the ink spread outward like a stain, blurring your clean edges into a fuzzy mess. This is ink bleeding, and it is probably the most discouraging problem for new practitioners because it makes even correct brush movements look terrible.
Ink bleeding is rarely caused by a single factor. It is usually a combination of issues working together. Here are the main culprits and how to address each one:
Too much ink on the brush. If you dip your brush deeply into the ink and start writing without removing the excess, that surplus ink floods onto the paper the moment you press down. The fix is simple: after loading your brush, gently drag it against the edge of your ink dish to remove excess. You want the brush saturated but not dripping. A useful test — if ink pools at the tip before you even touch paper, you have loaded too much.
Paper that is too absorbent for your ink consistency. Raw Xuan paper (sheng xuan) is highly absorbent and designed for experienced calligraphers who can control ink flow precisely. As calligraphy paper specialists note, beginners should use semi-sized or fully sized paper rather than raw Xuan paper for daily practice. Sized paper has been treated with an alum solution that reduces absorbency, keeping ink on the surface where you placed it rather than letting it spread uncontrollably. If your current paper bleeds no matter what you do, switching to a less absorbent option often solves the problem immediately.
Ink that is too thin or watery. Diluted ink spreads faster because it has less viscosity to resist the paper's pull. Test your ink by placing a small dot on a corner of your practice paper. If it bleeds quickly and widely, the ink needs thickening. With bottled ink, you can pour a small amount into an open dish and let some water evaporate naturally, or simply use less water when diluting. If the dot barely spreads at all, the ink may be too thick — add water one drop at a time until you find the right balance.
Moving too slowly. Speed and bleeding are directly related. The longer your brush stays in contact with one spot, the more ink transfers to the paper and the more time that ink has to spread. Slow, deliberate scripts like Regular Script are more prone to bleeding than faster Running Script for exactly this reason. The correction is not to rush — it is to maintain steady, continuous movement rather than pausing mid-stroke. A stroke should flow from start to finish without hesitation points where ink can pool.
Uneven Strokes and Shaky Lines
You aim for a smooth horizontal line and get something that looks like a seismograph reading. Shaky strokes are the second most common complaint, and they almost always trace back to tension in the body rather than a problem with materials.
Gripping the brush too tightly. When you are concentrating hard, your natural instinct is to grip harder — as if squeezing the brush will give you more control. The opposite is true. A tight grip locks your fingers and wrist, transferring every tiny muscle tremor directly into the stroke. The brush should rest between your fingers with enough grip to prevent it from falling, but loose enough that someone could gently pull it from your hand. If your knuckles are white or your forearm aches after ten minutes, you are holding too tight.
Moving from the wrist instead of the arm. Small, wrist-driven movements produce short, jerky strokes because the wrist has a limited range of smooth motion. Chinese calligraphy writing — particularly for medium and large characters — should originate from the shoulder and elbow, with the wrist acting as a stabilizer rather than the primary mover. Imagine your arm as a pendulum swinging from the shoulder. The brush is simply the endpoint of that larger, smoother arc. This feels strange at first, especially if you are used to writing with a pen using wrist movements, but it produces dramatically steadier lines.
Working too slowly out of caution. Paradoxically, moving very slowly to "be careful" often makes strokes worse. At extremely low speeds, your hand cannot maintain a smooth path — it micro-corrects constantly, producing visible wobbles. A confident, moderately paced stroke is smoother than a painfully slow one. You are not drawing a stroke; you are executing a movement. Trust the motion and let the brush travel.
What does proper posture and movement feel like when it is working? Your shoulders are relaxed and dropped, not hunched toward your ears. Your elbow floats slightly above the table surface rather than resting on it. Your fingers hold the brush vertically or near-vertical, and the brush moves through space with your whole forearm guiding it. There is a sense of lightness — the brush glides rather than being pushed. When you finish a stroke, your hand feels relaxed rather than fatigued. Building this physical awareness takes time, but checking in with your body every few minutes during practice accelerates the process significantly.
Proportion and Spacing Issues
Your individual strokes look decent, but when you step back, the character as a whole looks off. Maybe it leans to one side, or the top half is cramped while the bottom sprawls. Proportion problems are harder to self-diagnose because they involve relationships between strokes rather than the quality of any single stroke.
This is exactly where gridded practice paper earns its value. The grid divides each character space into quadrants — typically four squares created by a vertical and horizontal center line, sometimes with additional diagonal guides. These lines give you objective reference points to check your work against.
Here is how to use the grid as a diagnostic tool: after writing a character, compare it to a model and ask specific questions. Does the center stroke actually cross the center point of the grid? Do left and right components occupy roughly equal space on their respective sides? Do strokes that should extend to the edges of the grid actually reach them, or do they stop short? As handwriting improvement guides emphasize, practicing on square grid paper designed for Chinese writing is the most effective way to internalize correct proportions — characters with left-right structure often follow a 1/3 to 2/3 ratio, while symmetrical characters should balance evenly around the center axis.
A common pattern among beginners is writing characters too small within the grid, clustering strokes toward the center and leaving empty margins on all sides. This happens because you are being cautious — afraid of overshooting the boundaries. The correction is deliberate: consciously extend your strokes closer to the grid edges. A well-proportioned character fills its space with confidence.
Here are the five most frequent beginner mistakes paired with their specific corrections:
- Ink bleeding through strokes — Switch to semi-sized or fully sized practice paper, reduce brush ink load, and maintain steady stroke speed without mid-stroke pauses.
- Shaky, wobbly lines — Loosen your grip, move from the shoulder and elbow rather than the wrist, and increase stroke speed slightly to let momentum smooth the path.
- Characters too small or cramped within the grid — Deliberately extend strokes to fill 80-90% of the grid square. Use the center lines to anchor your starting points and the edges as targets for stroke endpoints.
- Inconsistent stroke thickness — Practice individual strokes in isolation before combining them into characters. Focus on maintaining even pressure through the middle of each stroke, varying only at deliberate start and end points.
- Lopsided characters that lean left or right — Check that your vertical center strokes align with the grid's vertical center line. For characters with left-right components, verify that each side occupies its intended proportion of the grid space.
When you can describe chinese calligraphy writing problems in specific, technical terms — "my ink is bleeding because the paper is too absorbent" rather than "it looks bad" — you gain the ability to fix issues systematically instead of feeling stuck. Every problem has a mechanical cause, and every cause has a concrete adjustment. That diagnostic mindset is what separates practitioners who improve steadily from those who repeat the same frustrations for months.
Solving these common obstacles clears the path for longer-term growth — moving beyond basic characters into more expressive styles and developing a practice that deepens over years rather than weeks.
Next Steps on Your Calligraphy Journey
Diagnosing and fixing technical problems is a turning point. It means you are no longer guessing — you are observing, adjusting, and refining with intention. That shift in mindset is exactly what carries you from the beginner phase into sustained, self-directed growth. The question becomes: where do you go from here, and what resources will serve you best as the practice deepens?
Choosing Books and Courses for Continued Learning
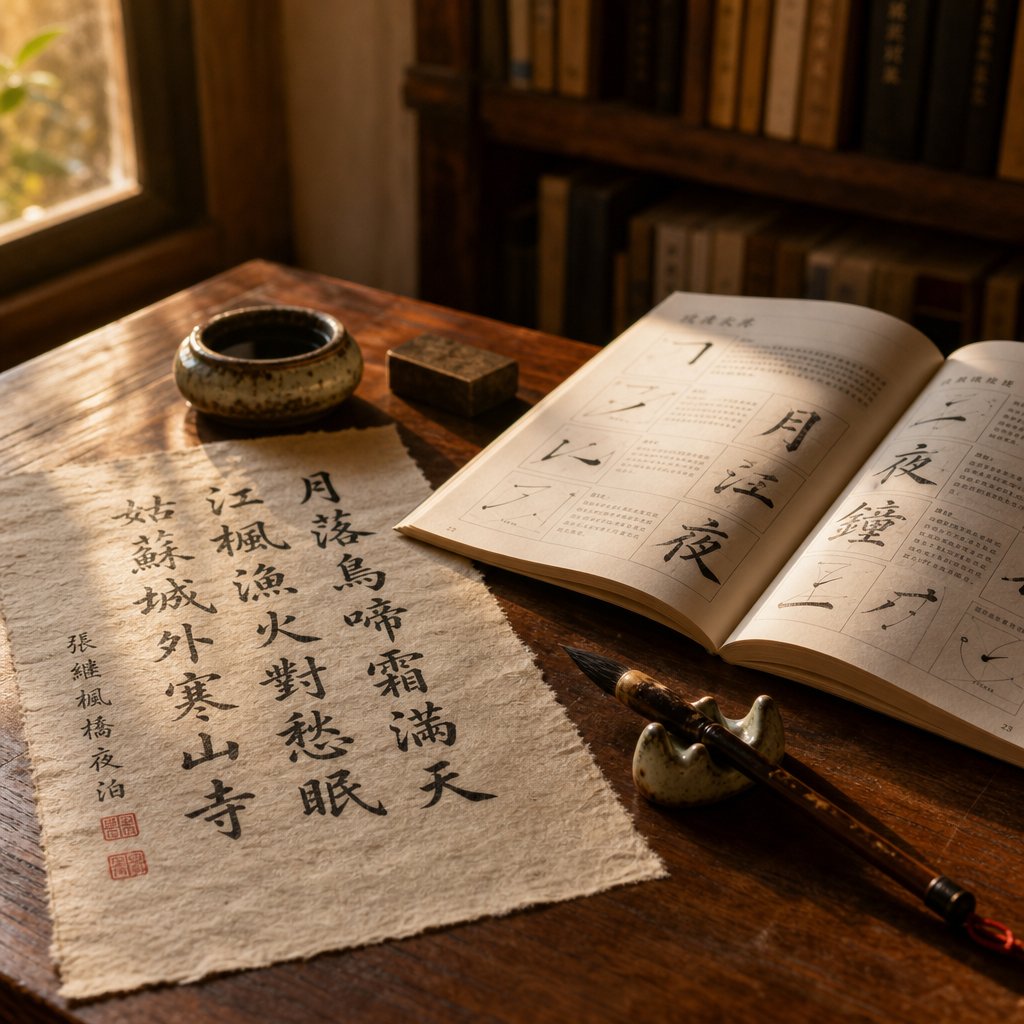
A good chinese calligraphy book does more than show you pretty characters. It teaches you how those characters are constructed, stroke by stroke, with clear diagrams that show brush direction, pressure points, and common errors. When evaluating instructional books, look for these qualities:
- Clear stroke-by-stroke diagrams with directional arrows and pressure indicators
- Practice templates or gridded pages you can photocopy or trace over
- Progressive difficulty — starting with basic strokes, moving to simple characters, then advancing to compound characters and phrases
- Historical context that connects technique to the tradition behind it
Structured books by experienced calligraphers provide reliable guidance for self-learners because they sequence skills in a tested order. Titles like Chinese Calligraphy: An Introduction to Its Aesthetic and Technique by Chiang Yee remain respected references that cover history, styles, and hands-on technique in richly illustrated chapters. For a more visual, character-focused approach, books that trace the evolution from pictograph to ideogram help you understand why characters look the way they do — which makes memorizing their structure far easier.
Beyond books, chinese calligraphy classes offer something printed pages cannot: real-time feedback on your technique. But the format you choose — online or in-person — shapes the learning experience in different ways.
In-person classes provide immediate correction. An instructor can spot a grip problem or a posture issue in seconds and physically demonstrate the adjustment. You also benefit from the social dimension — watching other students work, comparing approaches, and staying motivated through shared progress. The tradeoff is scheduling constraints, higher cost, and geographic limitations.
Online classes and virtual brush lettering course options offer flexibility and repeatability. You can pause, rewind, and rewatch a demonstration as many times as needed — something impossible in a live session. Costs tend to be lower, and you can access top instructors regardless of where you live. The downside is delayed feedback. Without someone watching your hand in real time, technique errors can become ingrained before you notice them. Self-motivated learners thrive in this format; those who need external structure may find it harder to stay consistent.
A practical approach for many learners is to combine both: use online resources for daily practice and technique study, then attend periodic in-person sessions for technique checks and corrections. Even a single workshop every few months can catch habits that self-assessment misses.
Setting Long-Term Goals in Your Calligraphy Journey
Calligraphy is not a skill you complete. It is a practice you deepen over years and decades. The calligraphers whose work fills museum collections — Wang Xizhi, Yan Zhenqing, Su Shi — practiced daily for their entire lives and still described themselves as students of the brush. That perspective is freeing rather than discouraging. It means there is no deadline, no final exam, no point where you should be "done."
Still, milestones help you recognize progress and stay engaged. Consider these as markers along the path:
- Writing all eight basic strokes with consistent quality and confidence
- Completing a full classical poem in Regular Script with balanced spacing
- Exploring Running Script — the semicursive style that became the most popular form of Chinese freehand writing due to its ease, convenience, and legibility
- Developing a personal rhythm where your brush moves fluidly without conscious deliberation over each stroke
- Writing a meaningful phrase or couplet as a finished piece you would display
Each milestone builds naturally on the one before it. You cannot write a balanced poem without mastering individual character proportions. You cannot explore Running Script without first internalizing the Regular Script structures it abbreviates. The progression has its own logic — trust it.
Consistent short daily practice outperforms occasional long sessions. Fifteen focused minutes every day builds deeper muscle memory and sharper visual awareness than a two-hour weekend session followed by days of inactivity.
This principle applies at every stage, from your first horizontal stroke to your hundredth poem. The brush rewards regularity. Your hand remembers what it practiced yesterday far better than what it practiced last week.
Ultimately, the journey itself — the meditative focus, the creative expression, the quiet satisfaction of a well-executed stroke — is the reward. Chinese calligraphy is one of the rare practices where the process and the product are equally valuable. Every session, regardless of the result on paper, trains your attention, steadies your breathing, and connects you to a tradition that has sustained practitioners for over three thousand years. Pick up the brush tomorrow. And the day after that. The path unfolds one stroke at a time.
Frequently Asked Questions About Chinese Calligraphy for Beginners
1. What supplies do I need to start Chinese calligraphy?
You need the Four Treasures of the Study: a medium-sized mixed-hair brush (jian hao) for balanced control, a bottle of Chinese calligraphy ink, gridded practice paper with guidelines for proper spacing, and a ceramic ink dish. Add a felt desk mat and brush rest to complete your starter kit. Mixed-hair brushes combine firm weasel hair with softer goat hair, giving beginners good ink absorption with enough resistance to maintain stroke control.
2. How long does it take to learn Chinese calligraphy?
Basic stroke competence typically develops within four to six weeks of consistent daily practice of 20-40 minutes. However, Chinese calligraphy is traditionally viewed as a lifelong discipline rather than a skill with a fixed endpoint. Most beginners can write simple characters with reasonable control after one month, complete short phrases after two to three months, and begin exploring semi-cursive Running Script after six months to a year of Regular Script practice.
3. Which Chinese calligraphy script style should beginners learn first?
Regular Script (kai shu) is the universally recommended starting point. It displays every fundamental stroke type clearly and separately, making it easy to see where each stroke begins and ends. The structured, upright characters teach proper pressure control, proportions, and spatial awareness that transfer directly to all other styles. From the Tang Dynasty onward, Regular Script has served as the foundational training script in calligraphy education.
4. Can I learn Chinese calligraphy without a teacher?
Yes, self-directed learning is entirely viable with structured practice and honest self-assessment. Use gridded practice paper to check proportions, compare your work against model characters, and focus on correcting one specific issue per session. Key self-assessment criteria include consistent stroke thickness, clean stroke starts and endings, and proper character proportions within the grid. Periodic workshops or online classes can supplement self-study by catching technique issues that are difficult to self-diagnose.
5. What is the best first character to practice in Chinese calligraphy?
Start with 一 (yi, meaning one) — a single horizontal stroke that teaches even pressure, consistent thickness, and controlled start and finish. Progress through 二, 三, and 十 to build stroke combinations, then advance to 大 and 木 for diagonal strokes. The character 永 (yong, meaning eternity) is the traditional culmination exercise because it contains all eight basic stroke types in one character, a training method known as the Eight Principles of Yong.