Understanding Chinese Name Stamps and Their Cultural Significance
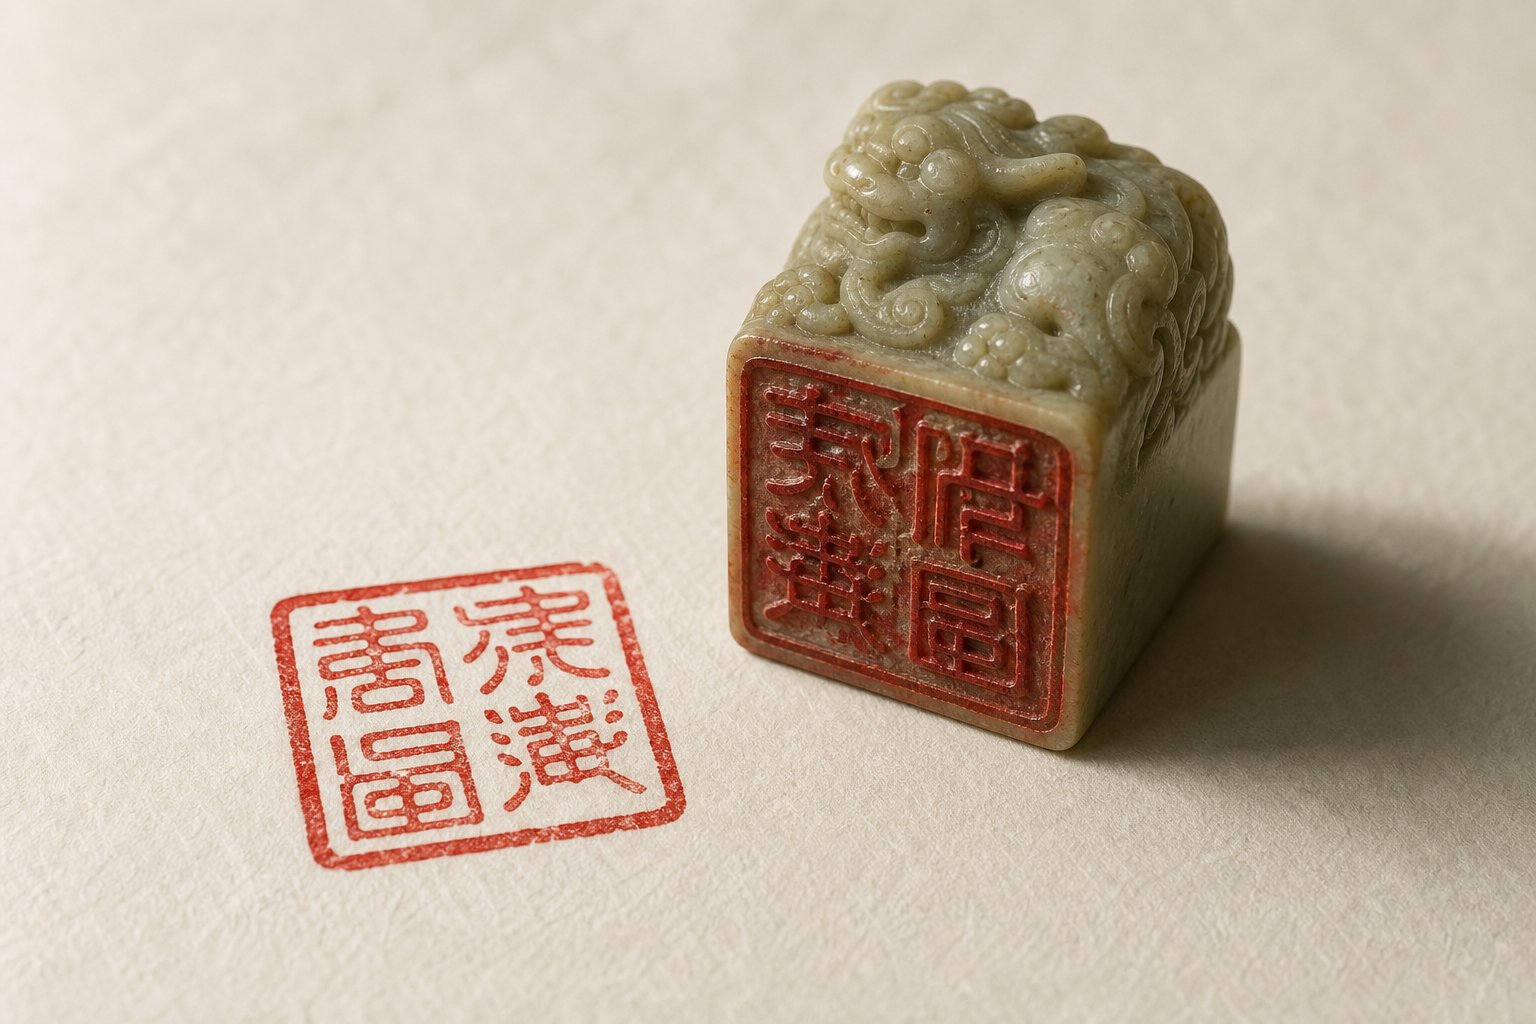
Imagine signing your name not with a pen, but with a carved stone pressed into vermilion ink paste. That's exactly what a Chinese stamp, or seal, does. For thousands of years, these small carved objects have served as personal signatures, artistic statements, and symbols of authority across China and East Asia. Whether you call it a chop, a seal, or a stamp, this tool carries a weight of tradition that few Western equivalents can match.
Creating your own Chinese name stamp might sound intimidating, especially if you can't read Chinese. But here's the good news: by the end of this guide, you'll understand how to choose characters, pick a script style, design a layout, and produce a finished seal you can actually use on artwork, letters, or personal projects.
What Is a Chinese Name Stamp and Why It Matters
A Chinese seal chop is a carved object, typically stone, used to imprint a name or phrase in red ink onto paper. The practice dates back to the Shang Dynasty (1600-1046 BC), making it one of the oldest continuous art forms in human history. By the Warring States period (475-221 BC), seals were already standard tools for signing official documents, and during the Han Dynasty they became essential to daily life and governance.
What elevates seal carving beyond mere utility is its integration of four distinct arts: calligraphy (the beauty of the characters), composition (how they fill the space), knife technique (the carver's skill with the blade), and ink application (the quality of the final impression). Mastering even one of these elements takes years, yet the ancient chinese stamp tradition remains accessible to beginners who approach it with respect and curiosity.
In Chinese artistic tradition, seal carving is considered the fifth art form, standing alongside poetry, calligraphy, painting, and music as a complete expression of cultural refinement.
Types of Chinese Seals and Their Traditional Uses
Not all chinese seals serve the same purpose. Understanding the main categories helps you decide what kind of stamp to create:
- Name Seals (姓名章): The most common type, bearing the owner's name. Traditionally, artists prepare a pair of name seals, one carved in relief and one in intaglio, both in square format. These are used to sign paintings, calligraphy, and documents.
- Studio Seals (斋号章): Popular since the Tang Dynasty, these carry the name of an artist's workspace or studio. They add a layer of identity and are often carved in a natural, irregular shape rather than a strict square.
- Leisure Seals (闲章): Despite the casual-sounding name, these are important artistic elements. A leisure seal might contain a philosophical phrase, a personal motto, or a poetic expression. They serve decorative and compositional purposes on artwork, helping balance the visual weight of a painting or scroll.
Old chinese seals found on historical artworks often include collector's seals as well, stamped by successive owners over centuries. You'll notice famous scrolls covered in dozens of red impressions, each one a chapter in the artwork's provenance.
For most people learning how to create a chinese name stamp, the name seal is the natural starting point. It's the most personal, the most useful, and the most traditional choice. A single well-made china seal can serve you for a lifetime, whether you're an artist signing prints, a calligraphy student marking practice sheets, or simply someone who appreciates carrying a piece of this living tradition.
The real question, then, isn't whether you should make one. It's which characters will go on it, and that decision shapes everything that follows.
Step 1 Choose Your Chinese Name Characters
Your characters are the soul of your chinese name stamp. Pick the wrong ones, and you might end up with something nonsensical, or worse, accidentally offensive. Pick the right ones, and your seal carries genuine meaning every time you press it to paper.
Chinese names follow a specific structure: surname first, given name second, typically totaling two to four characters. A two-character name (one surname, one given name) is common, while three characters (one surname, two given name characters) is the most traditional format. Four-character names exist but are less frequent. This matters for your seal because the character count directly affects your layout options later.
For non-Chinese speakers, two reliable approaches exist for selecting characters: phonetic transliteration and meaning-based translation. Each has distinct advantages depending on what you want your chinese name seal to communicate.
Phonetic Transliteration Method for Non-Chinese Names
Phonetic transliteration matches the sounds of your existing name to Chinese characters that carry similar pronunciations. Think of it like finding Chinese syllables that echo your name when spoken aloud. This is the same method used for foreign celebrities, place names, and brand names in Chinese media.
Here's the catch: you can't just grab any character with the right sound. As explained by Fluent in Mandarin, specific characters have been designated for transliterating foreign names. They carry their own meanings but have been "borrowed" for their sounds. For instance, the sound "ba" uses the character 巴, not other characters like 吧 or 把 that share the same pronunciation.
Some sounds in your name might not exist in Mandarin at all. The result can sound quite different from the original. "Will Smith" becomes 威尔·史密斯 (wei er shi mi si), which barely resembles the English pronunciation. Your name will undergo similar adaptation.
- Break your name into individual syllables (e.g., "Michael" becomes "Mai-ke-er").
- Use a chinese writing generator or tools like purple culture pinyin lookup to find the standard transliteration characters for each syllable.
- Select either your full name or just your surname for the seal, keeping in mind that shorter names (2-3 characters) work best visually.
- Check that the combined characters don't accidentally form an existing Chinese word with an unintended meaning.
- Confirm the tonal pronunciation sounds natural when read aloud by a Mandarin speaker.
One practical shortcut: search your name on English Wikipedia, then switch to the Chinese language version (中文) in the sidebar. If you share a name with anyone notable, you'll find the established transliteration right there.
Meaning-Based Character Selection Approach
Rather than mimicking sounds, this method selects characters based on what they mean. You're essentially creating a new Chinese name that reflects your personality, values, or aspirations. Many long-term residents in China and serious calligraphy students prefer this route because the result looks and sounds like a genuine Chinese name.
Start by choosing a Chinese surname. You might pick one that sounds vaguely similar to your own last name, or select one you simply like. A chinese last name generator can help you explore options from the hundred most common surnames. Then choose one or two given-name characters with meanings that resonate: perhaps 明 (bright), 安 (peaceful), 志 (ambition), or 雨 (rain).
The advantage here is clear. A meaning-based name fits naturally into a seal composition, reads as authentic Chinese, and carries personal significance you chose deliberately. The tradeoff is that it requires more research and ideally some guidance from a native speaker.
Verifying Your Character Choices
Whichever method you choose, verification is essential before you commit characters to stone. A single stroke difference can change a character's meaning entirely.
- Ask a native speaker: This is the gold standard. Share your chosen characters with a Chinese-speaking friend, teacher, or online community. Ask specifically whether the combination sounds natural and whether it carries any unintended connotations.
- Cross-reference multiple sources: Don't rely on a single translation tool. Check your characters against at least two dictionaries or a chinese writing generator to confirm both pronunciation and meaning.
- Consider regional differences: Mainland China uses simplified characters while Taiwan, Hong Kong, and many traditional art contexts use traditional characters. Decide which system fits your intended use. For seal carving, traditional characters are more common since seal script predates simplification.
- Test the visual weight: Some characters have very few strokes (like 一, meaning "one") while others are dense and complex. For a balanced seal, characters with roughly similar stroke counts look best together.
Getting your characters right at this stage saves real frustration later. A beautifully carved seal with poorly chosen characters is like an elegant frame around the wrong painting. With your characters confirmed, the next decision is equally visual: which script style will give those characters their final form on your seal face.
Step 2 Select Your Seal Script Style
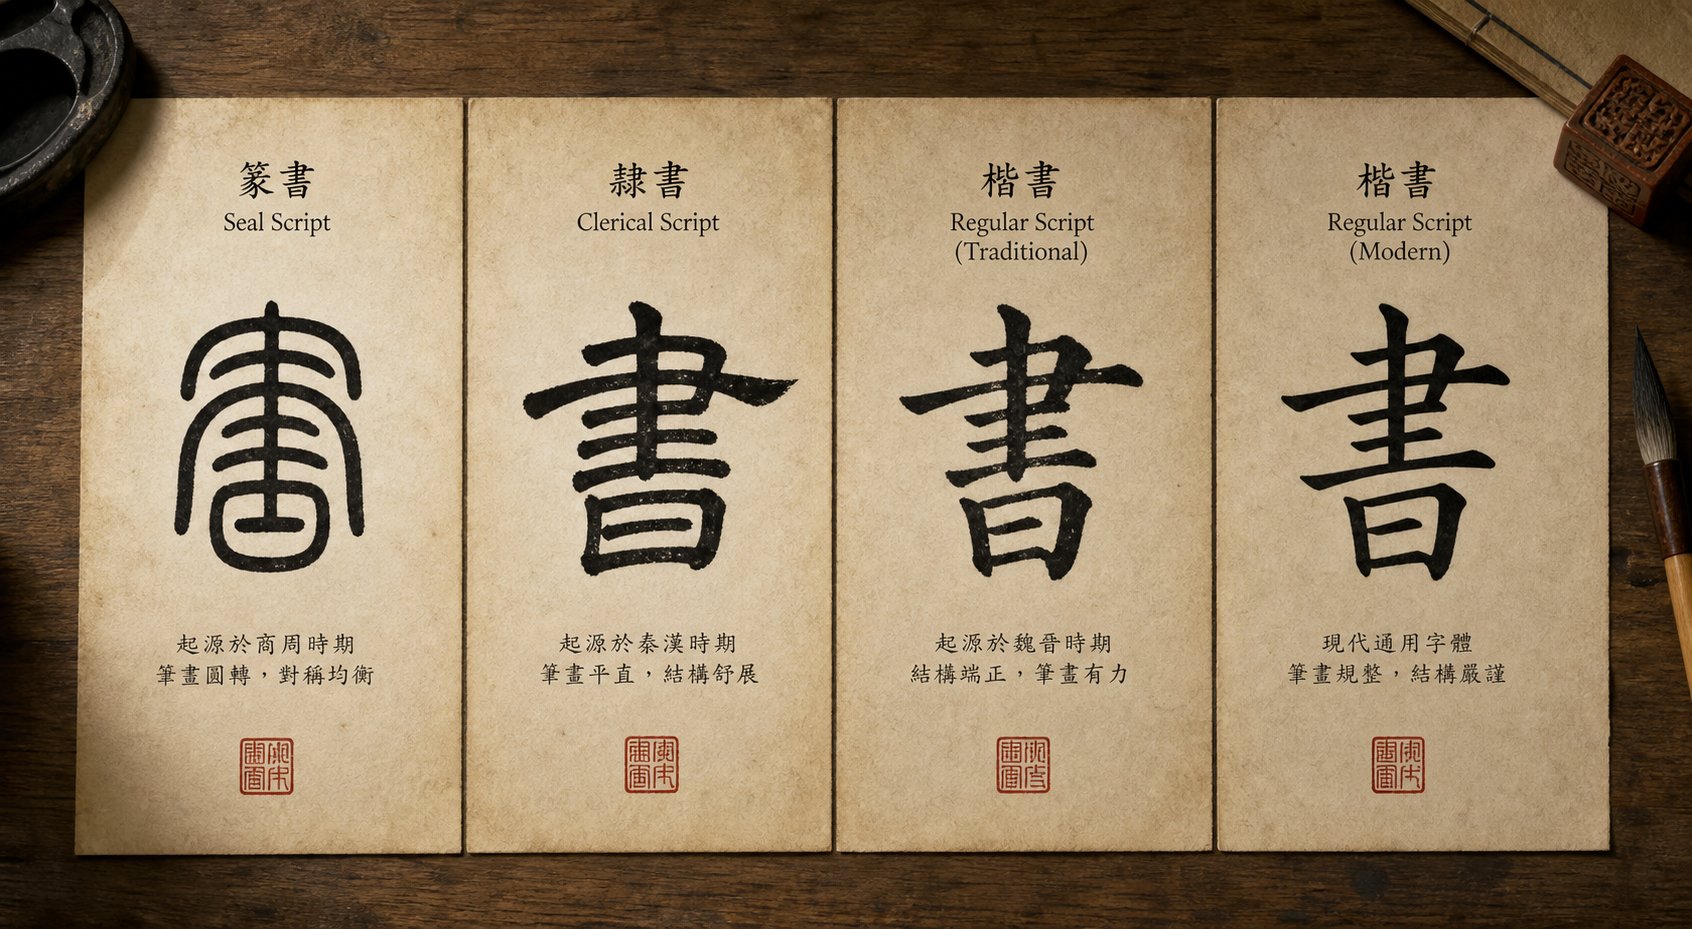
Characters alone don't determine how your seal looks. The script style you choose transforms those same characters into dramatically different visual forms. Imagine writing the letter "A" in Times New Roman versus a medieval blackletter font. The difference between Chinese script styles is even more striking, and for seal carving, one style has dominated for over two thousand years.
Seal Script vs Modern Chinese Characters
If you've seen modern Chinese text on a menu or street sign, you've encountered standard script (kai shu). It's clean, angular, and built from distinct strokes that lift off the page. Seal script (zhuan shu) looks almost nothing like it. Developed during the Qin Dynasty (221-206 BC), chinese seal script features tall, symmetrical characters made with thin, even lines. Vertical strokes run straight, horizontal strokes stay flat, and curves flow smoothly without sharp angles.
Why does this matter for your stamp? Seal script was literally designed for carving into hard materials like jade, bronze, and stone. Its uniform line thickness translates perfectly to knife work, and its balanced proportions fill a square seal face with natural elegance. The characters maintain a consistent height-to-width ratio of roughly 3:2, giving every impression a sense of solidity and visual weight.
Here's what catches most beginners off guard: seal script chinese characters can look completely unrecognizable compared to their modern equivalents. The character for "dragon" (龙 in simplified, 龍 in traditional) becomes an elaborate pictographic form in seal script that more closely resembles the original drawing of a dragon. This ancient quality is part of the appeal. A seal script stamp carries a visual authority that modern characters simply can't replicate, connecting your personal seal to millennia of tradition.
Finding Seal Script Forms of Your Characters
You don't need to study ancient Chinese to find the correct seal script versions of your chosen characters. Several online tools do the conversion instantly. A seal script generator takes modern characters as input and outputs their zhuan shu equivalents, often in multiple historical variants.
Here's a practical approach:
- Use dedicated seal script databases: Websites like the Chinese Seal Script Dictionary or Shufa.org allow you to enter modern characters and browse authenticated historical forms pulled from actual ancient seals and bronze inscriptions.
- Compare multiple variants: Most characters have several seal script forms that evolved across different dynasties. Pick the version that balances visual clarity with aesthetic appeal for your seal size.
- Verify stroke structure: Some seal script generator tools produce approximations rather than historically accurate forms. Cross-reference your results against at least two sources to confirm the character is correct.
- Consider legibility: If you want people to recognize your seal, choose a "small seal script" (xiao zhuan) variant. It's more standardized and slightly closer to modern forms than the older "great seal script" (da zhuan).
Save or screenshot the exact seal script forms you select. You'll need these reference images when designing your layout and transferring the design to your seal face.
Alternative Script Styles and When to Use Them
Seal script is traditional, but it's not your only option. Some carvers choose other styles for specific artistic reasons. Here's how the main options compare:
| Script Style | Visual Characteristics | Difficulty Level | Best Use Case |
|---|---|---|---|
| Seal Script (Zhuan Shu) | Tall, symmetrical, even line thickness, smooth curves | Moderate (unfamiliar forms) | Traditional name seals, formal artwork |
| Regular Script (Kai Shu) | Square, clear strokes, familiar modern appearance | Low (recognizable characters) | Casual seals, when legibility is priority |
| Clerical Script (Li Shu) | Wide, flat, distinctive "goose tail" horizontal strokes | Moderate | Decorative leisure seals, artistic statements |
| Running Script (Xing Shu) | Fluid, connected strokes, informal and expressive | High (abstract forms) | Leisure seals for experienced artists |
Regular script works well if you want recipients to easily read your name. Clerical script offers a distinctive look with its wavelike horizontal strokes, described by the Smithsonian's National Museum of Asian Art as featuring prominent down strokes that give it an elegant, wide-set appearance. Running script is expressive but borders on illegible for most readers, making it better suited to leisure seals with poetic phrases rather than name identification.
For a first seal script stamp, zhuan shu remains the strongest choice. It looks unmistakably like a seal, carries historical weight, and its even line thickness is forgiving for beginner carvers. The uniform strokes mean small imperfections in your knife work won't stand out the way they would in a style that relies on thick-thin variation.
With your script style selected and reference characters in hand, the next challenge is spatial: how to arrange those characters within the confined geometry of your seal face so they breathe, balance, and read in the correct order.
Step 3 Design Your Seal Layout and Composition
A seal face is a tiny canvas with strict spatial rules. You're working within a square or rectangle no larger than a few centimeters, and every millimeter of that space needs to feel intentional. The arrangement of characters, the carving method, and the border design all interact to produce either a harmonious chinese seal stamp or a cluttered mess. Getting the composition right before you pick up a knife (or open a digital tool) saves you from starting over.
Arranging Characters in Square and Rectangular Formats
Chinese seals read from top to bottom and right to left, following traditional text direction. The number of characters you're working with determines which format and arrangement works best. Here are the standard layout rules:
- Two characters: Stack vertically in a tall rectangular format (top to bottom), or place side by side in a square format (right character first, left character second). Vertical stacking is more traditional for name seals.
- Three characters: Use a rectangular format with the single-character surname on top and the two given-name characters below, reading right to left. Alternatively, arrange all three vertically in a narrow rectangle. Some carvers place one character on the right column and two on the left to create visual asymmetry.
- Four characters: The classic square format works perfectly here. Arrange in a 2x2 grid reading top-right, bottom-right, top-left, bottom-left. This is the most balanced and visually satisfying layout for a chinese chop stamp, which is why four-character seals are so common in traditional practice.
When characters have unequal stroke counts, you'll need to adjust spacing. A dense character like 鑫 (26 strokes) next to a simple one like 一 (1 stroke) creates an obvious imbalance. Skilled carvers solve this by slightly expanding simpler characters to fill their allotted space, or by allowing denser characters to breathe into adjacent margins. The goal is visual equilibrium, not mathematical precision.
Relief Carving vs Intaglio Carving Explained
Every chop seal uses one of two fundamental carving methods, and the choice isn't purely aesthetic. It carries cultural meaning.
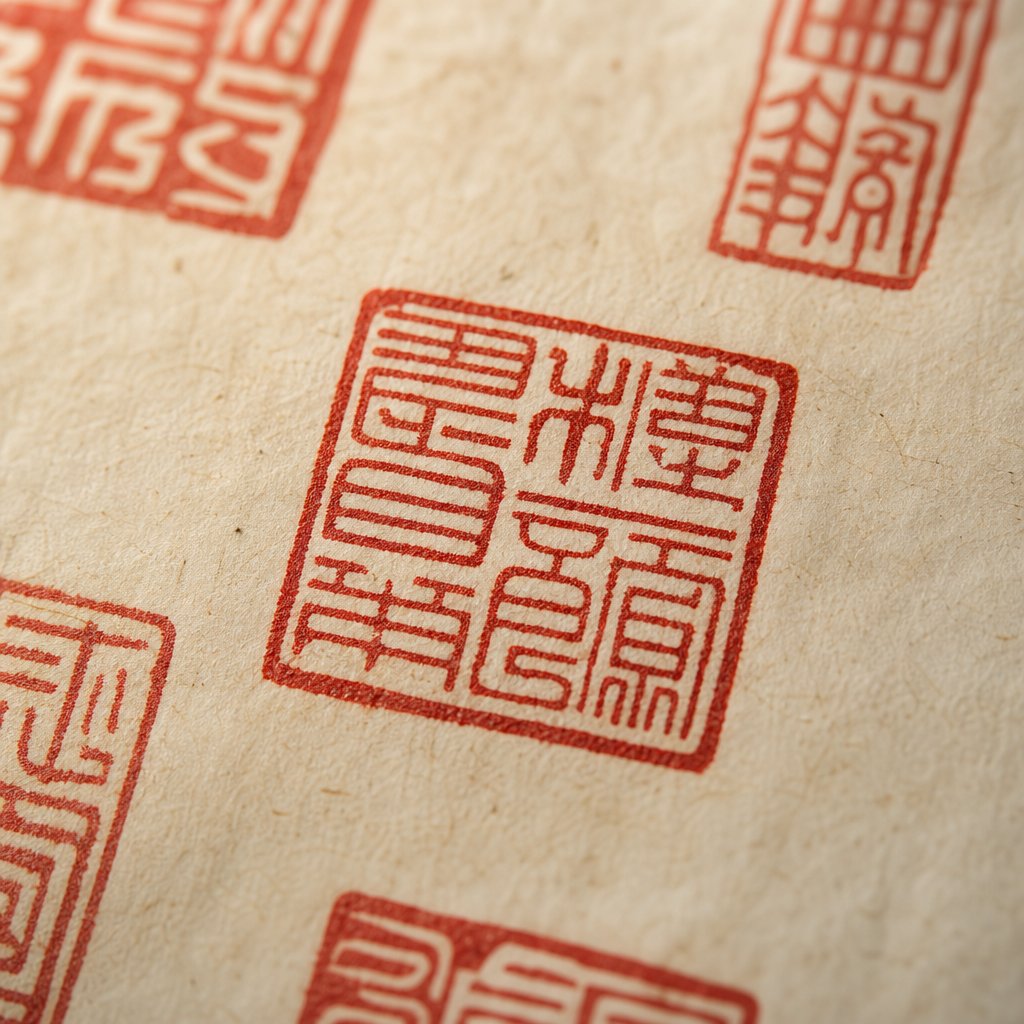
Zhuwen (朱文), also called relief or yang carving, removes the background material so the characters stand raised on the seal face. When stamped, the characters print in red against a white background. Baiwen (白文), also called intaglio or yin carving, cuts the characters themselves into the stone. The result is white characters against a solid red background.
| Feature | Zhuwen (Relief / Yang) | Baiwen (Intaglio / Yin) |
|---|---|---|
| Impression appearance | Red characters on white background | White characters on red background |
| Visual weight | Lighter, more delicate | Heavier, bolder |
| Traditional pairing | Often used for courtesy names or studio names | Often used for formal full-name seals |
| Best with ink style | Light, elegant calligraphy | Bold, heavy brushwork |
| Carving difficulty | Higher (thin raised lines are fragile) | Lower (removing character areas is more forgiving) |
| Cultural tone | Refined, literary | Authoritative, classical |
Traditional practice pairs one of each. As noted in classical seal etiquette documented by Qi Ming Calligraphy, when using two name seals on one calligraphy work, it's best to use one red (zhuwen) and one white (baiwen) with appropriate sizes. The intaglio seal typically goes on top, with the relief seal below. For a single chinese stamp seal, baiwen is the safer traditional choice for a formal name seal, while zhuwen suits leisure seals or studio names.
Balancing Composition and Border Design
The border frames everything. Too thick, and it overwhelms the characters. Too thin, and the impression looks fragile or incomplete. A good rule of thumb: border thickness should roughly match the stroke width of your characters. This creates visual unity between frame and content.
Spacing between characters and between characters and the border also matters. Traditional seal chop design leaves a small but consistent gap, called "red ground" in zhuwen seals, between the outermost strokes and the border edge. Characters shouldn't touch the border unless you're deliberately going for a rustic, broken-border aesthetic popular in some artistic styles.
A few composition principles to keep in mind:
- Density creates energy: Characters packed tightly with minimal white space feel powerful and formal. More breathing room feels open and literary.
- Symmetry isn't mandatory: While square seals suggest symmetry, slight variations in character size or positioning add life. Perfectly mechanical spacing looks digital, not hand-carved.
- The border can break: Intentional gaps or worn spots in the border give a chinese chop seal an aged, organic quality. Many carvers deliberately chip small sections after finishing.
- Red-to-white ratio: In baiwen seals, aim for roughly equal amounts of red (inked surface) and white (carved-away characters). Too much red feels heavy; too much white loses impact.
Sketch your layout on paper at actual size before committing to any material. Draw the border, divide the space into character zones, and pencil in your seal script forms. Flip the sketch in a mirror or photograph it reversed, because what you carve will be a mirror image of the final impression. This preview step reveals spacing problems that are invisible until you see the composition as a unified whole.
Layout and carving style settled, the practical question becomes: what will you actually make this seal from, and which creation method matches your skills and budget?
Step 4 Choose Your Creation Method and Gather Materials
You've got your characters, your script style, and a layout sketch. The next decision is entirely practical: how are you going to turn that design into a physical (or digital) seal? Your options range from carving stone by hand the way artisans have done for centuries, all the way to clicking a button on a chinese seal generator and downloading a file. Each method produces a different result, and the right choice depends on what you value most.
| Method | Cost Range | Skill Required | Time Investment | Authenticity Level |
|---|---|---|---|---|
| Hand-carving in stone | $15-$80 (materials) | Moderate to high | 2-8 hours | Highest (traditional craft) |
| Rubber stamp DIY | $5-$20 | Low to moderate | 30-60 minutes | Low (functional, not traditional) |
| 3D printing | $10-$40 | Moderate (CAD skills) | 1-3 hours (plus print time) | Low to moderate |
| Digital seal generator | Free to $15 | None | 5-15 minutes | Digital only (no physical stamp) |
| Custom order from artisan | $30-$300+ | None | 1-4 weeks (shipping) | Highest (professional quality) |
If you want the experience of making something with your hands and don't mind a learning curve, stone carving is deeply rewarding. If you need a seal image for digital artwork tomorrow, a chinese seal stamp generator handles that instantly. And if you want a museum-quality piece without the labor, commissioning a custom chinese seal from a skilled carver delivers exactly that.
Traditional Hand-Carving Materials and Tools
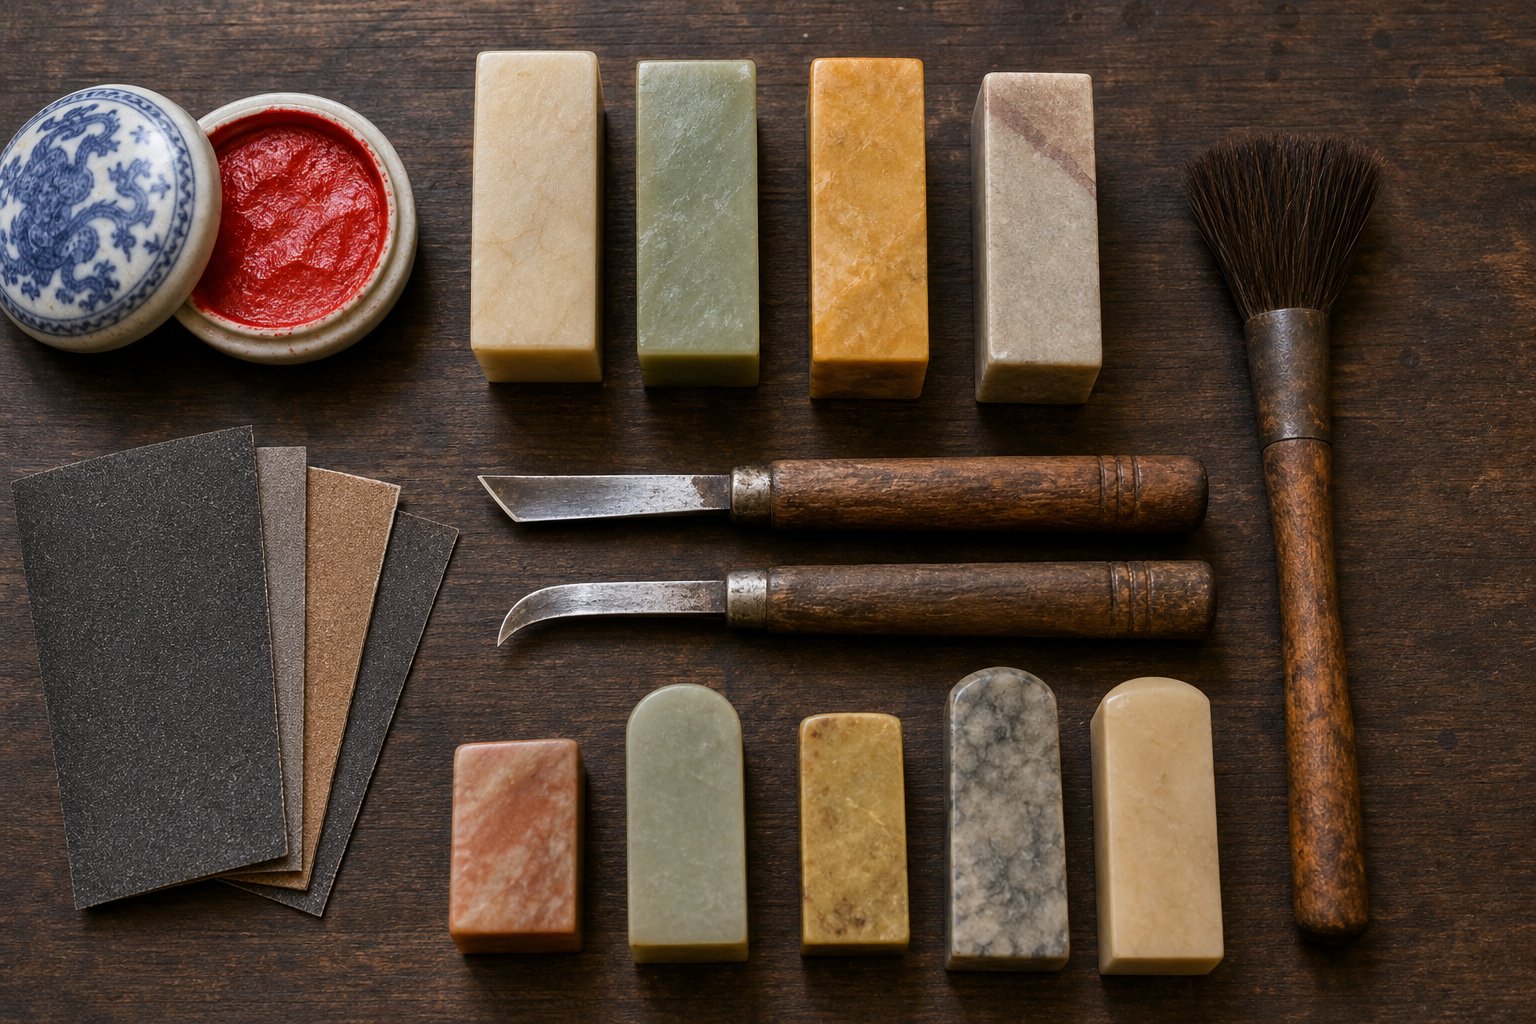
Hand-carving a chinese stone stamp connects you directly to the craft's history. The material matters enormously. Not all stone is suitable, and what's commonly called "soapstone" in English actually covers several distinct minerals with different carving properties.
Three stone families dominate traditional seal carving, each quarried from specific regions of China:
- Qingtian Stone (青田石): Quarried in Qingtian County, Zhejiang Province. Mostly light green, composed primarily of pyrophyllite. This was the most common stone for seals during the Ming and Qing dynasties and remains the standard student stone at Chinese art academies due to its affordability and consistent carving quality. Its best variety, Fengmen Jelly Stone, is considered the finest seal stone available.
- Shoushan Stone (寿山石): From Shoushan Village, about 40 km north of Fuzhou City, Fujian Province. Glossy and wax-like, available in many colors. Includes prized sub-varieties like Tianhuang (Field Yellow), which commands extremely high prices. For beginners, standard Shoushan mountain pit stone offers a smooth, forgiving carving experience.
- Balin Stone (巴林石): Mined in Inner Mongolia since 1973, making it the newest of the three major seal stones. It comes in many colors and has a reputation for being less prone to cracking than other popular seal stones. A good choice if you're worried about material splitting during your first attempts.
A word of caution from experienced carvers: the seal stone market is full of misidentified and synthetic materials. What's sold as rare chicken-blood stone may be dyed composite, and "soapstone" blanks from craft stores are often too soft for durable seals. Buy from reputable suppliers who specialize in chinese stone seal stamp materials, and be skeptical of anything priced far below market rate.
For tools, you need surprisingly little to start:
- Flat knife (平刀): Your primary carving tool. A blade width of 6-8mm works well for standard seal sizes (2-3cm). Used for push cuts that remove material in controlled lines.
- Angled knife (斜刀): A blade ground at an angle, useful for detail work and cleaning corners. Essential for zhuwen (relief) carving where thin raised lines need precision.
- Sandpaper (400-800 grit): For flattening the seal face before transferring your design. An uneven surface produces uneven impressions.
- Small brush: For clearing stone dust from carved channels as you work.
- Mirror or tracing paper: For reversing your design before transfer, since the carved image must be a mirror image of the final print.
Quality knives with tungsten carbide tips hold their edge longer and cut cleaner lines. Budget sets work for practice, but you'll feel the difference immediately if you upgrade.
Digital and 3D Printing Alternatives
Not everyone wants to carve stone, and that's perfectly fine. A chinese seal generator produces digital seal images you can use on electronic documents, digital artwork, or social media. These tools let you enter your characters, choose a script style, adjust the layout between zhuwen and baiwen, and export a high-resolution image, often for free.
The results look convincing on screen. Some generators even simulate the slightly imperfect edges and ink texture of a real stamp impression. For artists working digitally, a chinese seal stamp generator provides a functional seal without any physical materials at all.
3D printing opens a middle path. You can design your seal in CAD software or use an online tool to generate a 3D model, then print it in resin or hard plastic. The printed seal works with real ink paste and produces physical impressions. It won't have the weight or warmth of stone, but it's precise, repeatable, and lets you iterate on designs quickly. If your first version has spacing issues, you simply adjust the file and print again.
Rubber stamp carving is the most accessible hands-on option. Soft rubber blocks from craft stores carve easily with basic linoleum cutting tools. You won't get the fine detail possible in stone, but for a functional seal that stamps cleanly, rubber delivers results in under an hour. It's also a low-risk way to test your layout before committing to a more permanent material.
Ordering a Custom Seal from an Artisan
If your goal is a beautiful, authentic seal without the learning curve, commissioning one from a professional carver is the most direct route. Custom chinese seal orders are available from artisans in China, Taiwan, Japan, and increasingly from carvers based in Western countries who trained in traditional methods.
When ordering, you'll typically provide:
- Your chosen characters (verified, in the correct script style)
- Preferred stone type and size
- Carving style (zhuwen or baiwen)
- Any layout preferences or reference images
Expect to pay $30-$80 for a competent machine-assisted seal, $80-$200 for a hand-carved piece from a skilled artisan, and significantly more for premium stone or a renowned carver. Many sellers on platforms like Etsy, Taobao, and specialized calligraphy supply shops offer this service with turnaround times of one to four weeks including shipping.
Ask to see a proof image before the carver commits to stone. A reputable artisan will send you a digital mockup or ink impression of the design for approval. This is your chance to catch character errors or layout issues before they become permanent.
Whichever path you choose, the method only determines how you execute. The real craft lives in the next phase: actually producing your seal, stroke by stroke or click by click, and turning a design concept into something that leaves its mark on paper.
Step 5 Create Your Chinese Name Stamp
Materials gathered, design sketched, method chosen. This is where the concept becomes real. Whether you're generating a digital seal in minutes or spending an afternoon carving stone, the process follows a logical sequence that protects you from costly mistakes. Let's walk through both methods in full detail so you can follow along regardless of which path you picked.
Using an Online Seal Script Generator
A digital approach is the fastest way to produce a usable seal image. Think of it as a chinese font generator specifically built for traditional seal formats. You enter characters, choose parameters, and the tool renders a complete seal design you can download and use on digital artwork, documents, or social media profiles.
Here's the process using Gaitubao's online seal generator, one of the most popular free tools available:
- Navigate to the tool and set up translation: The interface is in Chinese, so install a browser translation extension like Immersive Translate or use Chrome's built-in translation. This lets you read all menu options clearly.
- Select your font style: Choose from the dropdown menus at the top of the page. Options typically include seal script (zhuan shu), clerical script, and regular script. For an authentic look, stick with seal script.
- Choose your seal format: Pick between zhuwen (red characters, white background) and baiwen (white characters, red background) based on the composition decisions you made in the previous step.
- Enter your Chinese characters: Type 2 to 4 characters into the input field. The system automatically adjusts layout based on character count. Two-character names often get extended to four characters with the addition of "zhi yin" (制印, meaning "seal of").
- Generate and review: Click the generate button and examine the output. Check that characters are correctly rendered in seal script and that spacing looks balanced.
- Export your image: Save the generated seal via screenshot or download. For digital artwork use, you'll want a PNG with a transparent background, which some generators offer directly.
The result won't have the organic imperfections of a hand-carved seal, but it gives you an accurate preview of how your characters look in traditional format. Many artists use a chinese caligraphy generator like this to test multiple name variations before committing to a physical carving. It's also perfectly functional if your primary need is adding a seal impression to digital scans of calligraphy or paintings.
One limitation worth noting: these tools are system-generated, so the artistic quality and texture won't match what a skilled engraver produces. Use the digital version as a reference or placeholder while you develop your carving skills or wait for a custom order to arrive.
Hand-Carving Your Seal Step by Step
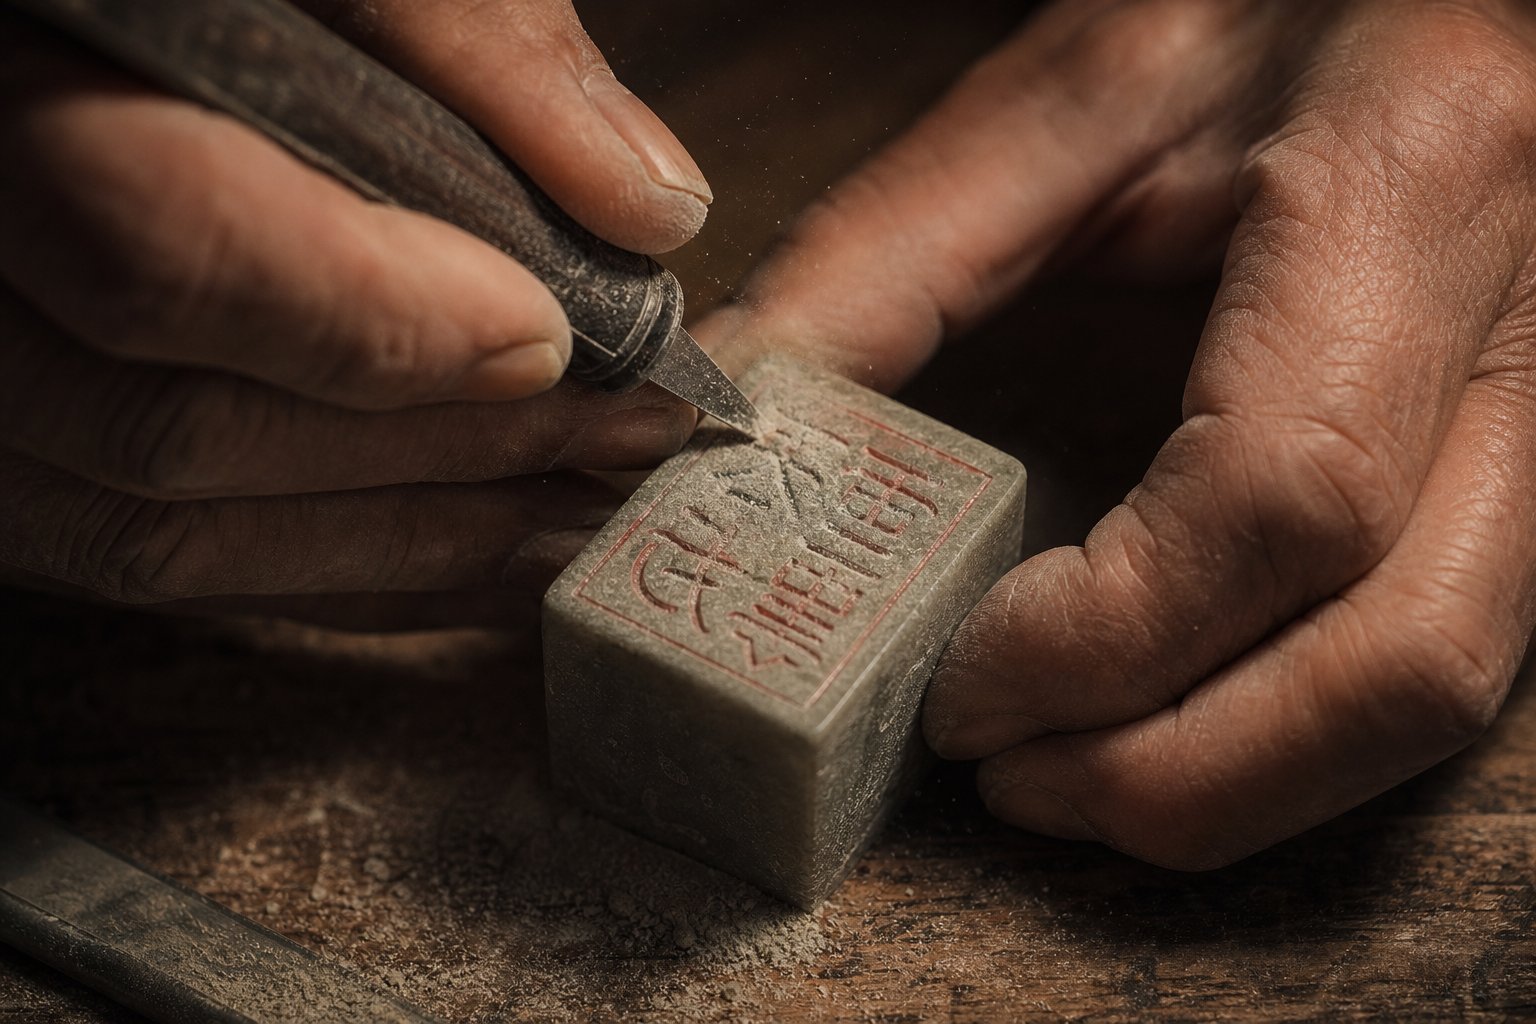
Carving stone is slower, messier, and infinitely more satisfying. You're doing exactly what seal artists have done since the Ming Dynasty, just with the advantage of modern reference tools. The key principle to internalize before you start: everything you carve is a mirror image. The seal face reads backward so the impression reads forward.
- Flatten the seal face: Place 400-grit sandpaper on a flat surface (glass works well). Rub the bottom of your stone in circular motions until the face is perfectly level. Check by pressing it against an ink pad and examining the impression. Any gaps mean more sanding.
- Transfer your mirror-image design: Write or print your seal script characters on thin paper using a soft pencil or ink. Place the paper face-down on the stone and rub the back firmly with a smooth tool. The reversed image transfers to the stone surface. Alternatively, paint your design directly onto the stone using a fine brush and red ink, working from a mirrored reference.
- Outline the characters: Using your flat knife, make shallow cuts along the outlines of each character. For baiwen (intaglio), you're cutting the characters themselves. For zhuwen (relief), you're cutting the background around them. Keep cuts shallow at first, about 1mm deep.
- Remove material with push cuts: Hold the knife at a 30-45 degree angle and push forward into the stone, removing thin slivers. Work from the outside of each stroke inward. Push cuts give you control and predictable depth.
- Refine with pull cuts: For curves and tight corners, pull the knife toward you with gentle pressure. This technique handles the rounded strokes common in seal script better than pushing, which can chip unpredictably at direction changes.
- Deepen gradually: Make multiple passes rather than trying to reach full depth in one cut. For baiwen seals, aim for a depth of 1.5-2mm. Deeper cuts produce cleaner impressions but increase the risk of chipping.
- Clear and test: Brush away stone dust, press the seal into ink paste, and stamp onto paper. This test impression reveals problems invisible on the stone itself: uneven depth, missed spots, or characters that read incorrectly.
- Adjust and finish: Based on your test impression, go back and deepen shallow areas, clean up rough edges, or widen strokes that printed too thin. Repeat the test-and-adjust cycle until you're satisfied. Some carvers deliberately nick the border or add small imperfections for an aged, organic feel.
The entire process typically takes two to four hours for a beginner working on a standard 2.5cm stone. Don't rush. Stone doesn't forgive the way rubber does, and a slip of the knife can ruin a character that took thirty minutes to carve.
Common Mistakes and How to Fix Them
Every beginner hits the same problems. Knowing them in advance helps you either avoid them entirely or recover gracefully when they happen.
- Forgetting to mirror the design: You carve the characters reading correctly on the stone face, then stamp and realize everything prints backward. Fix: always work from a reversed reference. Hold your sketch up to a mirror before transferring, or use a calligraphy chinese generator to produce a mirrored output you can trace directly.
- Uneven seal face: The impression prints clearly on one side but fades or disappears on the other. Fix: return to the sanding step. Place the stone on sandpaper and apply even pressure while making figure-eight motions. Test with ink until the entire face contacts paper uniformly.
- Characters too thin or too thick: Strokes that looked balanced in your sketch appear spindly or bloated in the impression. Fix: for thin strokes, widen the carved channels (baiwen) or remove more background (zhuwen). For thick strokes, carefully shave material from the stroke edges. A china font generator can help you compare your proportions against a properly rendered reference.
- Chipped or broken strokes: A piece of stone breaks away where you didn't intend. Fix: if the chip is small, incorporate it as a natural imperfection. Traditional seals often show wear. If it's severe, you can fill the gap with a mixture of stone dust and cyanoacrylate glue, let it cure, then re-carve. For catastrophic breaks, sand the face down past the damage and start fresh.
- Inconsistent depth: Some parts of the impression print bold while others barely show. Fix: press your seal into ink and examine which areas pick up color unevenly. The high spots (printing too bold) need more material removed around them; the low spots (printing faintly) need the surrounding area carved deeper.
- Reading order confusion: Characters print in the wrong sequence because you arranged them left-to-right instead of right-to-left. Fix: remember that traditional Chinese reads top-to-bottom, right-to-left. In a 2x2 grid, the order is top-right, bottom-right, top-left, bottom-left. Double-check your layout against this pattern before carving.
Testing frequently is the single best habit you can develop. Experienced carvers stamp dozens of test impressions during a single project, checking progress after every few minutes of cutting. Each impression is a diagnostic tool that tells you exactly where to focus next.
With your seal carved and printing cleanly, the final variables are the ink you press it into and the technique you use to transfer that impression to paper. Both affect the result more than most beginners expect.
Step 6 Select Your Ink Paste and Master Stamping Technique
A perfectly carved seal paired with poor ink paste or sloppy technique produces a disappointing impression. The paste you choose and the way you apply pressure determine whether your chinese character stamps look crisp and authoritative or blotchy and amateurish. This step is where craft meets ritual.
Types of Seal Ink Paste and Their Meanings
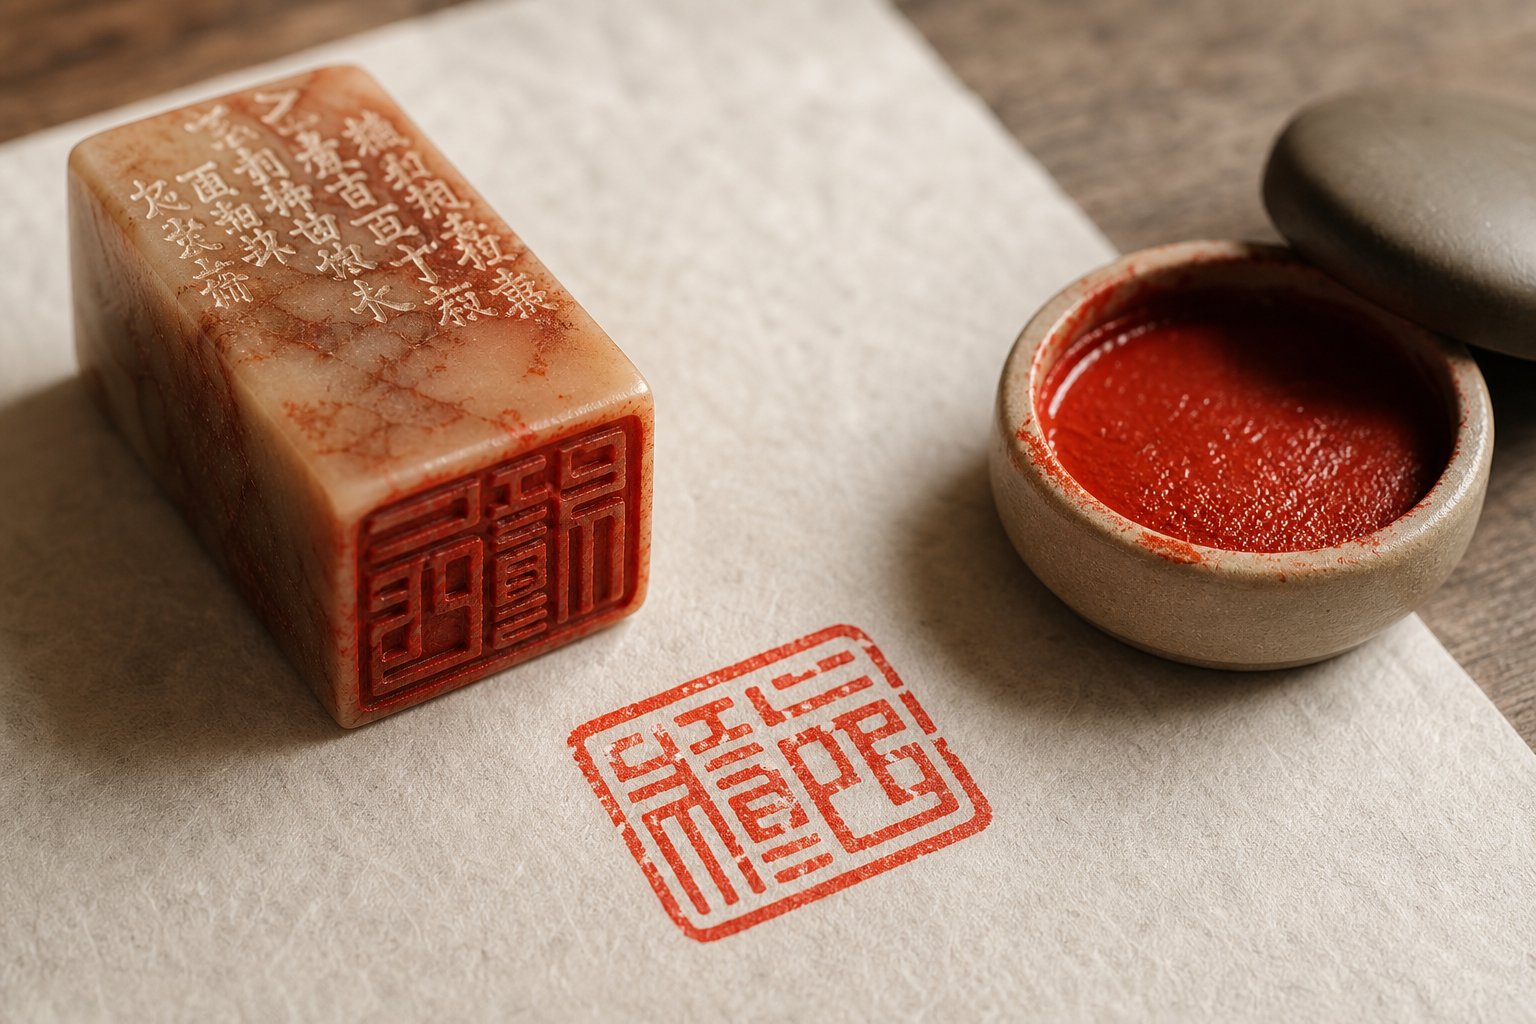
Seal ink paste, called yinni (印泥) in Chinese, isn't ink at all. It's a thick, sticky compound traditionally made from three core ingredients: cinnabar (mercuric sulphide), castor oil, and artemisia argyi (mugwort) fibers. High-grade pastes may also include gold, silver, pearl, or silk, which is why specialty yinni can cost hundreds of dollars for a small jar. The fibers bind the pigment to paper, the oil keeps the mixture workable, and the cinnabar provides that iconic vermilion color that lasts centuries without fading.
Color carries meaning. While red dominates, other colors serve specific cultural and artistic purposes:
- Red (vermilion/cinnabar): The standard and most traditional color for all seal types. Symbolizes authority, celebration, and authenticity. Used on formal documents, artwork, and calligraphy. Dark red suits larger seals; brighter orange-red works better for smaller chinese red stamp impressions.
- Blue: Often used for mourning or memorial contexts. Some artists also use blue seals on ink wash paintings where red would clash with the monochrome palette. It reads as contemplative and subdued.
- Black: Reserved for mourning periods or used on documents where red is culturally inappropriate (such as during bereavement). Also chosen by contemporary artists seeking a modern, understated look on black-and-white photography or minimalist compositions.
- Green, gold, and other colors: Primarily decorative. Gold paste appears on dark paper or special occasion pieces. Green is uncommon but available for artistic experimentation.
For your first seal, red cinnabar paste is the clear choice. It's traditional, versatile, and visually striking on any paper color. A mid-range cinnabar paste from a reputable maker provides excellent results without the investment of professional-grade yinni.
Proper Stamping Technique for Clean Impressions
You might assume stamping is simple: press seal into paste, press seal onto paper. But the difference between a muddy blob and a gallery-quality impression comes down to surface preparation, loading technique, and pressure control.
Prepare your surface first. Place 10 to 15 thin sheets of paper (or a thin felt mat) beneath the area where you'll stamp. This resilient cushion ensures the seal face contacts the paper evenly. A hard table surface underneath causes the impression to print only where pressure is strongest, leaving gaps elsewhere.
Load the seal correctly. Hold the paste container in one hand and your seal in the other. Gently dab the seal face onto the paste ball repeatedly, rotating the seal slightly between dabs. You're building an even, thin layer across the entire carved surface. Check the face after several dabs to confirm uniform coverage. As noted by experienced seal carver Mike Harty, different stone materials may require pressing more or less firmly into the paste, but even coating is always the priority.
Lower the seal gently onto your paper, press down firmly and evenly, then carefully rock the seal slightly toward each of the four corners to ensure complete contact. Press down one final time, hold the paper with your free hand, and lift the seal straight up in one clean motion.
Paper type matters more than most beginners realize. Absorbent papers like unsized xuan paper need moister paste and lighter, longer pressure. Smooth or sized papers require drier paste and a quicker stamp. Using the wrong combination results in either bleeding (too wet on absorbent paper) or incomplete transfer (too dry on smooth paper).
A few habits that produce consistently clean results with your chinese wax stamp or stone seal:
- Clean the seal face with a soft tissue after every use while the paste is still fresh. Dried paste builds up in carved channels and degrades future impressions.
- Stir your yinni every few months using a bamboo or plastic tool, never metal. The oil separates over time, and unstirred paste produces uneven color.
- Store paste in a ceramic container with an airtight seal. Keep it at room temperature or slightly warm. Cold paste becomes stiff and doesn't transfer well.
- Practice on scrap paper before stamping finished artwork. Your first impression of a session is often the weakest because the paste hasn't warmed to the stone yet.
Mastering this technique takes a few dozen impressions at most. Once your hands learn the pressure and rhythm, every stamp becomes a small, satisfying ritual. The real art then shifts to knowing exactly where on your artwork that red impression belongs, and how to place it with the same intentionality you brought to carving it.
Step 7 Position Your Seal Correctly and Use It Respectfully
A seal stamped in the wrong spot can unbalance a painting, confuse a viewer, or signal unfamiliarity with the tradition you're drawing from. Placement isn't arbitrary. Centuries of convention dictate where a chinese artist stamp belongs relative to the composition, the signature, and the edges of the work. Learning these rules takes minutes, but following them tells every knowledgeable viewer that you understand what you're holding.
Where to Place Your Seal on Artwork and Calligraphy
Seal positioning depends on the type of work you're marking. Each context has its own logic, rooted in how the viewer's eye moves across the piece and how the red impression interacts with surrounding ink and empty space.
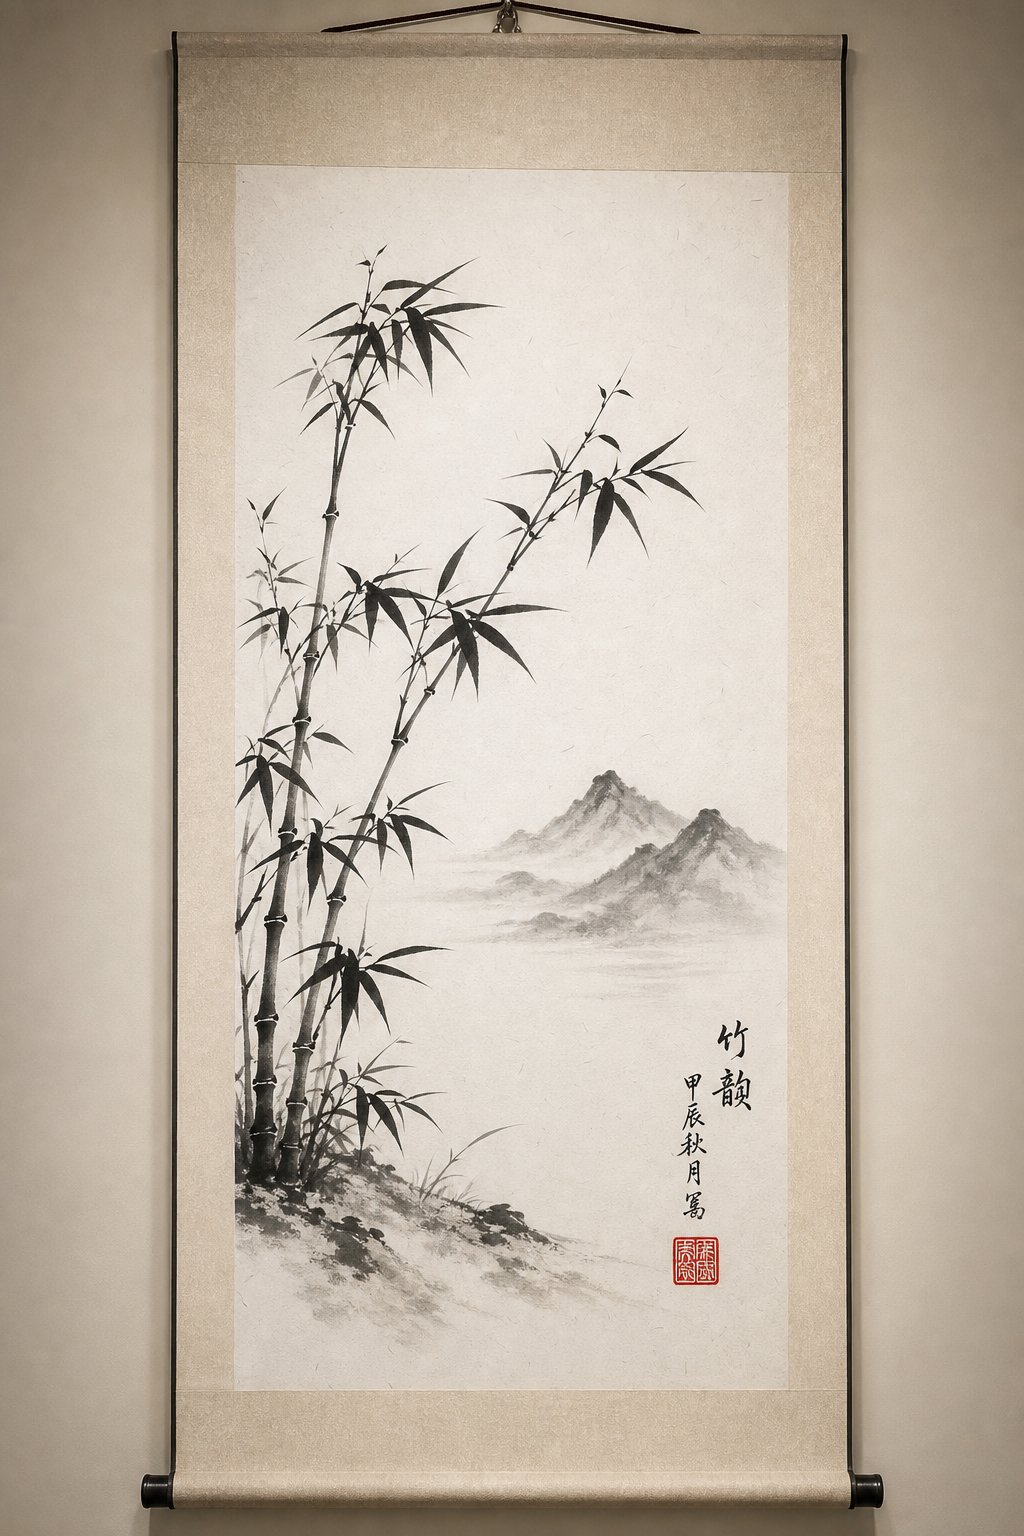
- Chinese paintings (guohua): Your personal name seal goes directly below or beside your painted signature, typically in the lower-left or lower-right corner. If the composition is vertical (a hanging scroll), the seal usually sits at the bottom-right beneath the inscription. On horizontal compositions, it follows the signature wherever that falls. A leisure seal, if you use one, goes in the opposite corner to create diagonal visual balance. Leave enough margin so the seal doesn't crowd the painted image or bleed off the edge.
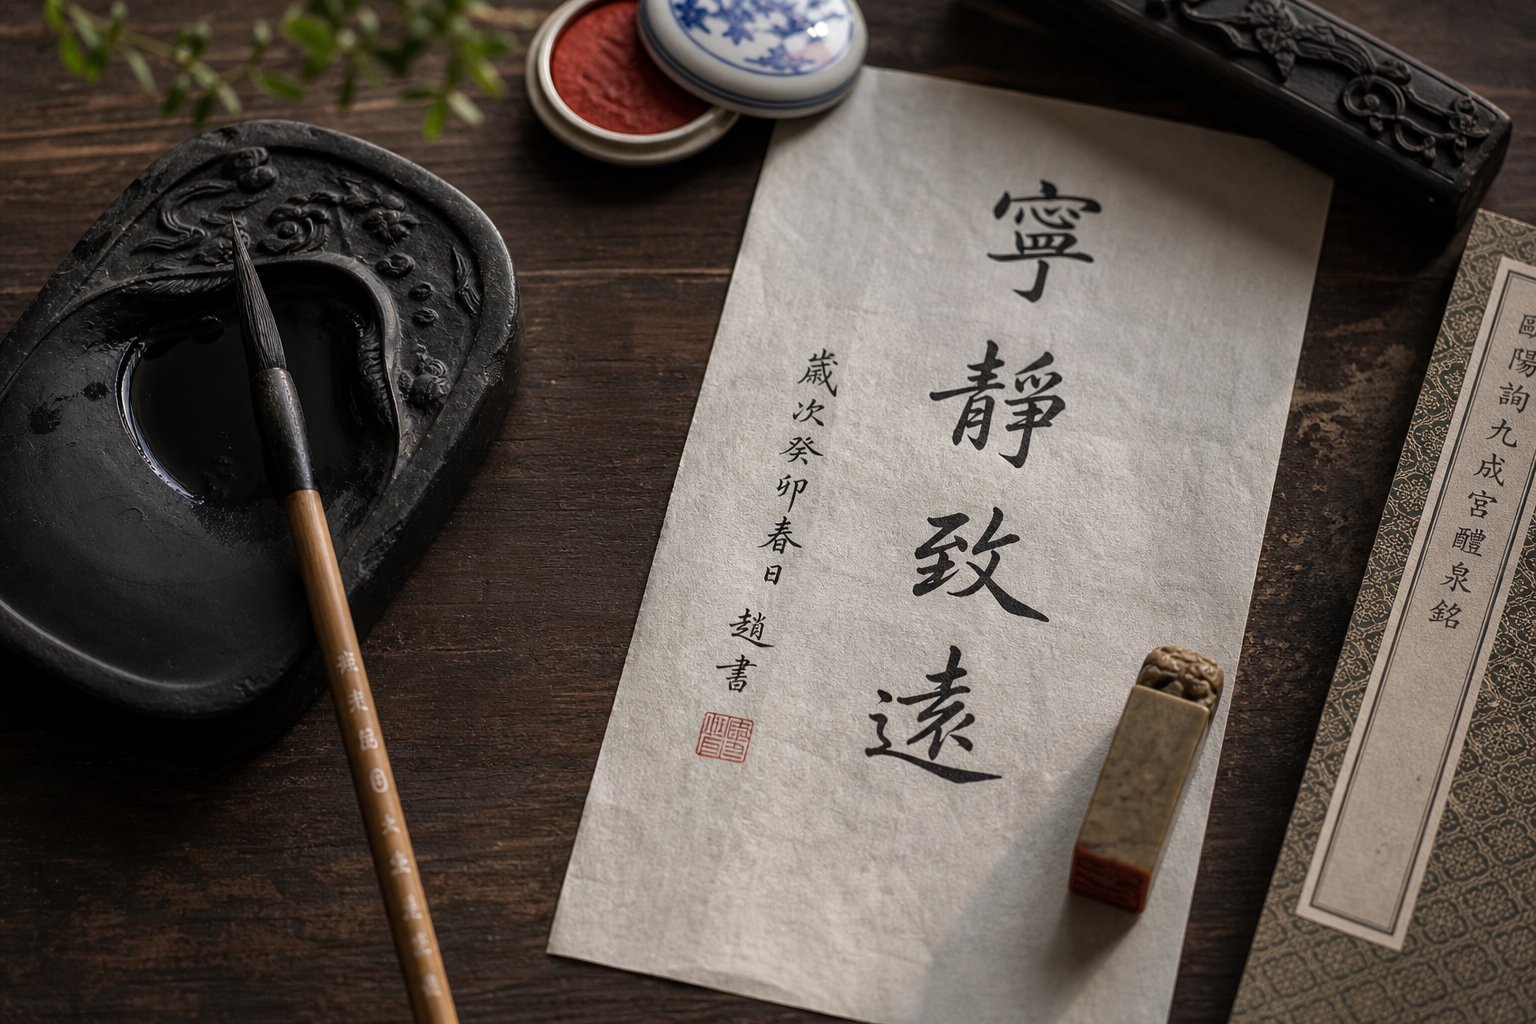
- Calligraphy scrolls: The name seal appears immediately after the final character of your signature, slightly below and to the left. If you have a pair of seals (one intaglio, one relief), the intaglio seal goes directly under the signature and the relief seal sits just below that, with a small gap between them roughly equal to one seal-width. A leisure seal or studio seal can be placed at the beginning of the text (upper-right corner), acting as a visual starting point called a "yin shou zhang" (引首章).
- Letters and personal correspondence: Place your seal after your name at the end of the letter. In traditional Chinese letter format, this means the lower-left area of the final page. The seal serves the same function as a wax seal on Western correspondence: authentication and personal touch.
- Documents and certificates: Formal documents typically require the seal to overlap slightly with the signature or printed name, proving the stamp was applied intentionally to that specific document rather than transferred from elsewhere. Position it so roughly one-third of the impression overlaps the text.
One universal rule applies across all contexts: never stamp your seal over the main subject of a painting or across important text. The impression should complement the composition, not compete with it. If you study how to identify chinese artist seals on historical works, you'll notice that master painters placed their seals in areas of empty space (called "breathing room") where the red adds visual weight without obscuring content.
Seal Etiquette for Non-Chinese Creators
Here's the question many non-Chinese artists hesitate to ask: is it appropriate for me to use a chinese signature stamp at all? The short answer is yes, with awareness. Chinese seal culture has been shared across East Asia for centuries. Korean, Japanese, and Vietnamese artists all adopted the practice and made it their own. Western artists working in East Asian media have used seals for generations.
What matters is approach, not ancestry. A few principles keep your use respectful:
- Invest in accuracy: Have your characters verified by a native speaker. A seal with incorrect or nonsensical characters signals carelessness rather than appreciation.
- Understand what you're stamping: Know the meaning of every character on your seal. If someone asks what your chinese signature says, you should be able to answer confidently.
- Match context to formality: Using a personal name seal on your own artwork is entirely appropriate. Stamping it on someone else's work, on sacred texts, or in contexts where it implies authority you don't hold crosses a line.
- Learn before you display: Placing a seal incorrectly on a piece of calligraphy you're exhibiting publicly suggests you adopted the aesthetic without the knowledge. The placement rules above exist precisely to prevent this.
- Credit the tradition: When showing work that features your seal, be open about your learning process. Most Chinese artists and calligraphers are genuinely pleased when foreigners engage seriously with seal culture rather than treating it as decoration.
Cultural appreciation becomes appropriation when it's shallow, inaccurate, or exploitative. A well-researched, correctly executed personal name seal used on your own creative work falls firmly on the appreciation side.
Using Your Seal as a Working Artist
For artists who paint, print, or practice calligraphy regularly, a seal becomes a functional tool rather than a novelty. It serves as your chinese artist signature, appearing on every finished piece and building recognition over time the same way a written signature does in Western art markets.
Practical considerations for regular use:
- Size matters relative to your work: A seal that's too large overwhelms a small painting. A tiny seal disappears on a large scroll. Most working artists keep two or three sizes. A 1.5cm seal suits small works and letters, a 2.5cm seal works for standard paintings, and a 4cm seal anchors large-format pieces.
- Consistency builds identity: Use the same seal across your body of work. Collectors and galleries use seal impressions to authenticate pieces, and inconsistency raises questions. This is exactly how scholars identify chinese artist seals on historical works, by matching impressions across an artist's known catalog.
- Pair your seal with a brush signature: The seal doesn't replace a written signature. Traditional practice includes both: a brushed inscription (name, date, sometimes a poem or dedication) followed by the stamped seal. The combination provides both personal handwriting and the formal mark of your carved identity.
- Keep your seal safe: Stone seals chip if dropped. Store yours in a padded box or fabric pouch. If the face gets damaged, you'll need to re-carve or commission a replacement, and your new impression won't match previous works.
Your seal is the final gesture on every piece you create. It says: this is complete, this is mine, and I stand behind it. That small red square carries the weight of every decision you made along the way, from choosing characters to selecting stone to learning the pressure of a clean impression. Used well, it connects your work to a tradition that has authenticated art and identity for over three thousand years.
Frequently Asked Questions About Creating Chinese Name Stamps
1. Can I create a Chinese name stamp if I don't speak Chinese?
Yes, you can create a Chinese name stamp without speaking Chinese. Two main approaches work for non-Chinese speakers: phonetic transliteration, which matches the sounds of your name to Chinese characters, and meaning-based translation, where you select characters based on their meanings. Online tools like seal script generators and pinyin lookup resources help you find appropriate characters. However, always verify your character choices with a native Chinese speaker before committing them to a seal to avoid unintended meanings or errors.
2. What is the difference between Zhuwen and Baiwen seal carving?
Zhuwen (relief carving) removes the background material so characters stand raised, producing red characters on a white background when stamped. Baiwen (intaglio carving) cuts the characters into the stone, resulting in white characters against a solid red background. Baiwen is considered more authoritative and classical, making it the traditional choice for formal name seals. Zhuwen appears more delicate and literary, often used for studio names or leisure seals. Traditional practice pairs one of each type when using two seals on a single artwork.
3. What type of stone is best for carving a Chinese seal?
Three stone families are traditionally preferred for seal carving. Qingtian stone from Zhejiang Province is the standard student stone, affordable with consistent carving quality. Shoushan stone from Fujian Province offers a smooth, glossy carving experience ideal for beginners. Balin stone from Inner Mongolia is the newest option and resists cracking, making it forgiving for first attempts. Avoid generic soapstone from craft stores, as it is often too soft for durable seals. Purchase from specialized suppliers to ensure authentic material.
4. Where should I place my Chinese seal on artwork?
On Chinese paintings, your name seal goes directly below or beside your painted signature, typically in the lower corner. On calligraphy scrolls, it appears immediately after the final character of your signature. If using a pair of seals, the intaglio seal goes on top with the relief seal below. A leisure seal can be placed in the opposite corner for visual balance. The universal rule is never stamp over the main subject of a painting or across important text. The seal should complement the composition by occupying areas of empty space.
5. How do I choose between a digital seal generator and hand-carving?
Choose based on your intended use, time, and skill level. Digital seal generators produce usable images in minutes for free, ideal for electronic documents and digital artwork. Hand-carving in stone takes 2-8 hours and requires moderate skill, but produces the most authentic result with unique character that connects you to the traditional craft. Rubber stamp DIY offers a middle ground with low cost and quick results. If you want professional quality without learning to carve, commissioning a custom seal from an artisan costs $30-$300 and delivers museum-quality work.